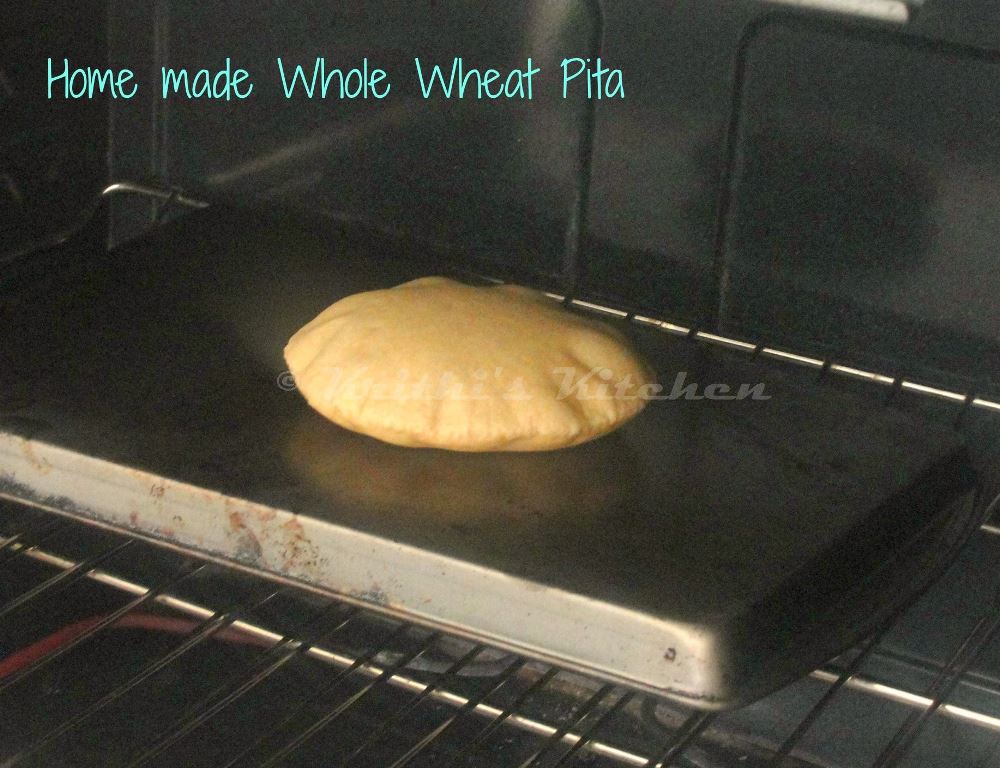
Every cuisine has its own variety of bread. Though I was used to Indian breads like Roti, Poori, Chapathi, Paratha, Naan, Kulcha I did not know there are so many other breads. My knowledge of non-Indian breads were limited to white and brown (wheat) breads until I came to know about many other varieties like foccacia, ciabatta, brioche.. well the list is endless. Being a hardcore foodie and a passionate food blogger I love to explore other cuisines and try out the dishes whenever I can. It was one fine day when I tried these Home made Pita Bread from Denny's space. May be I did something wrong with the measurements the first time, the dough was very loose and wasn't perfect. The next time I tried, the Pita came out perfect but it was the chips that was too thick and hard. Apparently I hadn't separated the layers before slicing to bake chips. And as they say "third time's the charm", this time both my bread and chips came out perfectly. The process is little intensive but when you taste these homemade beauties they are worth the effort.
For the Pita Bread
Ingredients:
Yield - 8
Whole wheat flour - 3 cups
Salt - 1 1/2 tsp
Extra virgin Olive oil - 1 1/2 tbsp + more for brushing
Honey - 1 tsp (can substitute sugar)
Active dry yeast - 1 pkt (approx 2 1/4 tsp)
Water - 1 1/2 cups
Method:
Whisk the flour and salt together. Add 1 1/2 tbsp of olive oil and mix together until it is well incorporated. Heat 1/2 cup of water until lukewarm. Add honey and the yeast. Mix and set aside to proof the yeast. When the yeast is frothy add this yeast mixture to the flour and knead to form a dough using the remaining water. Use water as needed to form a smooth pliable dough. Coat another bowl with oil and place the dough ball (coated with oil) and cover. Set aside in a draft-free space to rise. I set aside for 2 hours to fully rise to double the original volume.

When risen, punch down and form equal sized balls out of the dough. Cover with a damp cloth and set aside again to proof for 15 mins. Place a cookie sheet inside the oven in the center rack and preheat it to 500 F. In a rolling board, place one dough ball and roll to form a flat bread (about 6" diameter). Transfer to a plate and cover with damp kitchen towel until other balls are rolled out. Repeat for other balls. When the oven is heated, place one rolled out bread and bake for about 3 to 5 minutes or until puffed. Remove carefully with tongs and brush with some olive oil. Allow it to cool slightly before being served. Can be served as pita bread or pita pockets for falafel.
Notes for Pita Bread:
You may or may not need 1 1/2 cups of water. Use as required.
For good leavening, allow the dough to rise 3 times. One as a whole dough ball, second, after making small balls when the oven is preheating. Third, After rolling out the bread (a couple of minutes is good).
To make Pita Chips
Ingredients:
Serves - 2
Pita Bread - 2
Olive oil - 2 tbsp
Salt & pepper - to taste
Method:
Preheat the oven to 400 F / 200 C. Line a cookie sheet with aluminium foil. When the bread is still warm cut it into two and gently pull apart the cut part to form a pita pocket. Use a knife to separate the pockets. Cut into wedges. One pita bread can be made as 16 or 12 wedges. Coat the wedges with oil, salt and pepper. Transfer to the cookie sheet and arrange so that the wedges do not overlap. Bake for 10-15 mins until slightly golden and crisp. Serve warm or in room temperature with hummus or any dip of your choice.
Sending this to Nayna's Flavours of Greece event; Made with Love Mondays; Swathi's Favorite Recipes event.
This is one of DH's favorite ways to make palak and dhal curry. By "favorite" I mean he makes it this way and we all love it. It is truly a bachelor way of cooking and very tasty too. Simple ingredients and easy method of preparation makes this dish a breeze to make. Paired with hot rice and some spicy side dish like Seppankilangu / Colacasia Fry it makes a happy tummy and happy heart!
Ingredients:
Serves - 4; measurements in rice cooker cup
Pigeon peas / Toor dhal - 3/4 cup
Yellow moong dhal - 1/2 cup
Whole moong bean (green) - 1/2 cup
Spinach - 5 cups tightly packed - roughly chopped
Red chilli - 4 - broken
Garlic - 5 cloves
Onion - 1/2 of a big one - chopped
Mustard seeds - 1/2 tsp
Cumin seeds - 1/2 tsp
Asafoetida / Hing / Perungayam - 1/2 tsp
Salt - to taste
Oil - 1 tbsp
Method:
Wash and soak the dhals together for 30 mins to 1 hour. Heat oil in a pressure cooker and splutter the mustard, cumin seeds and asafoetida. Add the broken red chillies and onion followed by whole garlic cloves. When the onion becomes soft, add the spinach and saute until wilted. Add the drained dhals and 5 cups of water with salt. Cover and pressure cook for 5 whistles. When done, mash with back of a spoon and serve over hot steamed rice. Great with chapathis and dosas too.
Linking this to Pari's Only Cooking with Legumes.
This one is not much of a recipe per se, but an idea for a quick and healthy snack with leftover chapathi. If you want a colorful and healthy makeover for otherwise regular chapathi try this one. I also have another makeover recipe for chapathi which I will post soon. Now for the recipe.
Ingredients:
Leftover chapathi - 4
Onion - 1 cup - chopped fine
Green Bellpepper/Capsicum - 1/2 of a big one, any quantity of fresh vegetables can be added to make this dish more colorful and nutrient rich
Tomato - 1/2 - chopped fine
Oil - 1 tbsp
Mustard seeds - 1/2 tsp
Urad dhal - 1/2 tsp
Chana dhal - 1/2 tsp
Chilli powder - 1/2 tsp or to taste
Salt - to taste
Curry leaves - few (optional)
Method:
To reheat leftover Chapathi:
Wrap the chapathi in a wet kitchen towel and microwave for about 30 secs to a minute. Hot fresh chapathis ready.
Cut or tear the chapathi into small pieces. In a kadai heat oil and splutter the mustard seeds. Add urad dhal, chana dhal, curry leaves and onion. Saute until the onions turn soft and add the bell peppers. Fry for about a minute and add the chopped tomatoes with chilli powder and a pinch of salt. When the tomatoes are almost cooked add the cut chapathi pieces and mix until the vegetable mixture coats well on the chapathi. Serve hot for evening snack.
Broccoli is one of my favorite vegetables. In my point it is very versatile where I can have it simply steamed with a dash of salt and pepper or make it protein rich like in a usili or soup. But mostly I spice it up a little, but make sure I don't lose the original taste of it. This is a simple and one of my favorite ways of eating broccoli.
Ingredients:
Broccoli Crowns - 2
Garam Masala - 1 tsp
Chilli powder - 1/2 tsp - 1 tsp (per taste buds)
Garlic powder - 1 tsp or Asafoetida - 1/2 tsp
Olive Oil - 2 tbsp
Salt - to taste
Method:
Preheat the oven to 400 F. Line a cookie pan with foil or parchment paper and coat with some oil. Cut the broccoli into little florets and wash them. Drain well in a colander. Sprinkle the garam masala, chilli powder, garlic powder and salt. Toss to coat the spices well. Now add the oil and mix well. Spread as a single layer on the foil lined pan. Pop into the oven for 20-25 minutes turning over the florets once in between. Serve hot as a appetizer or side. A cool raitha would be a great dip for these goodies.
Linking these up to Priya's Healthy Me & Us; Vardhini's Bake Fest #18; Srivalli's Kid's Delight.
I picked up this bag of soy chunks on my grocery shopping last time, hoping to make something as a protein-rich snack. Not being a vegetarian myself I was not crazy about these when I was young. But tastes change as we grow, don't they. I thought I would give it another try and this chukka is my first attempt. When I came to know about Radhika's Tickling Palates being the featured blog in Tried & Tasted this month I knew I was definitely going to participate. Her's is a lovely space with so many homestyle and authentic recipes. I was going through her Recipe Index and guess what I found.. This easy to make Soya Chukka! I bookmarked it immediately and tried it pretty soon. This is great as an evening snack or as a side dish for rice or roti.
Ingredients:
Serves - 2; Preparation Time - 30 mins
Soy Chunks - 1 cup
Pearl onions / Sambar onions - 12 (peeled and halved)
Ginger garlic paste - 1 tbsp
Red chilli powder - 1 tsp (1 tsp if using kashmiri, I used spicy chilli powder so used only 1/2 tsp)
Coriander Powder - 2 tsp
Turmeric Powder - 1/2 tsp
Tamarind extract - 2 tbsp (optional)
Pepper powder + Cumin powder - 1/2 tsp (recipe called for crushing fresh pepper and cumin seeds but I took a shortcut)
Cilantro / Coriander leaves - a little for garnish
Salt - to taste
Oil - as needed
Method:
Heat about 5 cups of water in a saucepan. When it comes to a rolling boil, remove from heat and add the soy chunks. Cover and set aside for 30 minutes. Drain and squeeze the excess water and repeat rinse and squeeze with three exchanges of water. After final rinse and squeeze cut the soy balls into small pieces as desired. Set aside. Heat 3 tbsp of oil in a kadai and saute the pearl onions until pink. Add the ginger garlic paste and saute in medium heat for 2 minutes. Now add the spice powders (except pepper + cumin) and fry for a couple more minutes. Add 2 tbsp of oil (if the onion mixture is dry) and add the cut soy chunks with salt and tamarind extract and mix well. Cook for 5 minutes or until the soy chunks are cooked through. Garnish with coriander leaves and serve hot as a side for rice.
Notes:
1. Definitely use pearl onions. Substituting with regular onions would not even be close.
2. I am planning to skip the tamarind next time.
Linking this to Tried & Tasted event by Lakshmi.
Cooking from cookbooks is always exciting isn't it? I and my sister always used to experiment by cooking from cookbooks. It was those days when we learnt the difference between teaspoon and tablespoon measurements. I was more of a sous-chef doing all the chopping and she will be the one who cooks. Most of our "experiments" turned out fine, some "ok" but nothing went terribly bad :). I stopped collecting cookbooks after a while and recently started collecting again. This recipe is from my newest collection "Williams Sonoma - Soup" book. I loved all the recipes and many of it being pure vegetarian, made me love the book even more.

Savitha and I are pretty close blog buddies. I still remember when we first got into chatting. It was when she blogged about her Strawberry Banana Smoothie when we started exchanging comments and started chatting. Web chats got more than just food when she was pregnant with her second kid the same time that I was with Lil Kavin and she was a real support on tips on what to eat and to tackle glucose levels.. When I was skeptical on getting back to blogging full-fledged after a baby she was an inspiration which had me back. When she asked for a guest post in her space I immediately agreed. Who wouldn't want to be a guest.. right? This Cauliflower and Cheese Soup is something I have been wanting to make ever since I got this "Williams Sonoma - Soup" book.
Hop over to her space for the full recipe..
Happy Ugadi to everyone.. In our house Ugadhi is celebrated in a simple way with decorating the main entrance of the house with mango leaves, preparing ugadi pachadi, making this obbattu and like in all other Indian festivals, worshipping God for health and wellness. Being in US though I do not have access to mango leaves or neem flowers to make ugadi pachadi, I thought why not try the obbattu part.. This is a very simple recipe to make and takes much less time to make unlike most other Indian Sweets.
Ingredients:
Yields 12 pieces of 4" obbattus
Maida / All Purpose Flour - 1 cup
Oil - 1 tbsp + more for spreading out the obbattu
Grated Coconut (unsweetened) - 1 cup
Sugar - 1 cup (Jaggery can be substituted, but this is how it is made at my home)
Water - 1/3 cup + more for kneading dough
Cardamom powder - 1/4 tsp
Salt - a pinch
Method:
Mix the maida with salt and add water little by little to make a loose dough. Knead until the dough becomes non-sticky. Coat with 1 tbsp of oil, cover and set aside for a minimum of 30 minutes. Meanwhile prepare the coconut filling. In a non-stick kadai, heat water and sugar with cardamom powder until all of the sugar dissolves. Add the grated coconut and mix in medium heat until most of the water evaporates and the mixture becomes sticky. Remove from heat and allow it to cool. When it is cool enough to handle, make 12 lime-sized balls. Divide the dough also into 12 portions. In a flat surface, spread a plastic sheet (cling film works good here) and apply little oil. Place a dough ball and spread into a circle (trust me it would be irregular, but no worries) of 4" wide using fingers. Place the pooranam-coconut filling in the center and cover with the edges of the dough to close the filling completely. Press and spread again with fingers to make obbittus(poli). Heat a tawa and carefully place the spread out polis and allow to cook. Flip over and cook for another couple of minutes until done.
Notes:
1. Kneading well and setting aside the dough for 30 minutes ensures formation of gluten which enables the elasticity of the dough for easy stretching while spreading.
2. The filling has to be moist, frying it too much would dry it out and result in hard filling. It is impossible to use it as a stuffing then.
3. Oil/Ghee can be used while cooking. I did not use any.
4. I halved the above recipe to make 6 pieces just right for the 2 of us for a couple of days.
5. This stays good in room temperature for upto 3 days.
Linking this up to Celebrating Ugadi event of Madhu.
Pizza anyone? Home-made? Gluten-free? Low carb? Eggless? If you answer "yes" to the above questions, this is for you. When I was searching for a flourless pizza I arrived at this recipe. This is an easy to put together pizza and the step which would take time is just the chopping of the vegetables. The original recipe was a farinata crust which is similar to the crispy thin crust pizza. I wanted to make a more foldable crust and reduced the water and the set time for the pizza base. Totally loved the outcome! A gluten-free low-carb pizza which we enjoyed guilt-free..
Ingredients:
Adapted from here
Serves - 2
Besan / Chickpea flour - 1 cup
Water - 3/4 cup
Salt - 1/4 tsp
Italian seasoning - 1/2 tsp
Part skim mozzarella cheese - sliced thin - as needed
Parmesan cheese - 2 tbsp
Vegetables toppings:
Red bell pepper - 1/4 cup or more
Eggplant - chopped into 1/2" piece - 1/4 cup
pablano pepper - 1
Pitted Black Olives - 5 - sliced thin
Baby Spinach - handful
Sun-dried tomatoes - 1 tbsp - drained - chopped
Red onion - julienned - 1/4 cup or more
You favorite Pasta sauce - 1/4 cup or more
Red pepper flakes / Pepper - to taste
Method:
Whisk the chickpea flour with water without any lumps. Set aside for about 2 hours.
Preheat the oven to 450 F. Meanwhile chop the vegetables and prep the cheeses. Mix the pasta sauce with a pinch of salt, chopped sun-dried tomatoes and red pepper flakes. When the oven is preheated, put a 9 x 9 inch square (or round) pan into the oven 10 minutes for preheating. Skim the froth (if any) on the flour mixture. Mix in salt and italian seasoning. Pull the pan from the oven and spray some olive/canola oil. Pour the flour mixture and put the pan back in the oven for 12 - 15 minutes until the top of the base looks cooked and passes a fork test. When done, spread the prepared pasta sauce and top with sliced mozzarella cheese. Layer the vegetables all over the pizza and top with grated parmesan cheese. Put the pan back in the oven for 10 minutes or until the cheese melts. Serve hot.
Linking this up to the following events Healthy Foods for Healthy Kids - Italian event by Nithu; Flavours of Cuisines - Italian event by Julie; Vardhini's Bake Fest #18.

Vegetable Fried Rice is my ultimate go-to dish when I run out of ideas, have no mood to think or simply have to finish off its and bits of vegetables hanging out in the fridge. It is a family favorite too. Paired with a simple dhal tadka or a sabji it is a great meal altogether.
Ingredients:
Brown Basmati Rice - 1 cup
Water - 1-1/2 cups
Carrot - 1 - chopped
Red Bell Pepper - 1/2 - chopped
Green Bell Pepper - 1/2 - chopped
Asparagus - 4 spears - chopped
Zucchini - 1/2 - chopped
Spring Onions / Scallions - 2
Salt & Pepper - to taste
Sesame oil / Gingelly oil - 1 tbsp
Method:
Cook the brown basmati rice according to below instructions. When done fluff with fork and spread on a plate to cool completely. Heat oil in a wok in medium-high heat and add the spring onion whites. After 2 minutes, add the chopped asparagus. In 2-minute intervals add the carrots, zucchini, green bell peppers, red bell peppers one by one and saute continuously. Add the salt and pepper and immediately add the cooked cooled brown rice and mix well. Remove from heat, check for seasoning and mix in the spring onion greens. Serve hot with ketchup or any curry of your choice.
How to cook brown basmati rice in Pressure Cooker:
Wash and soak 1 cup of rice in water for 30 minutes. Drain the water and pressure cook with one and a half cups of water for 6 whistles. This is a rice-water ratio and number of whistles I got through trial-and error method. Other non-basmati brown rice may need different amount of water and cook time.
Linking this delicious rice bowl to Kid's Delight - Street Food and to Leftover Makeover.
 For the Pita Bread
 Method:
 Method: