Showing posts with label Appetizers. Show all posts

Thursday, February 26, 2015

Lilva Kachori / Broad Beans Kachuri | Indian Snack Recipes

I saw these Kachoris my friend Praks had posted in her FB page. Being a foodie, I did not wait long to ask her for the recipe. She was more than happy to share the recipe and added proudly that this is her family recipe. She is from Gujarat and the shape of the kachoris they make are like modaks and is different from the flattened kachoris from the other parts of India. I tried making them in both ways just for fun. Did I say that these were the fastest disappearing snack I made. My little one loved it to the core and asked if there was any leftover "Cat-turi" the next day.


Ingredients:
Makes 12 kachoris
For the filling:
Tuvar - 1 cup (fresh/frozen)
Green chilli - 1
Ginger - 1" piecec
Garlic cloves - 3
Cumin powder - 1/2 tsp
Sugar - 1/2 tsp
Coriander leaves - a fistful
Grated coconut - 1 tbsp
Lemon juice - 2 tsp
Oil - 1 tsp + more for deep frying

For the outer covering:
Wheat (atta) flour - 1 cup
Maida / All purpose flour - 1 cup
Salt - 1/4 tsp
Oil - 2 tbsp
Water - 2/3 cup (more or less)


Method:
Thaw the beans if using frozen. Pulse the green chilli, ginger and garlic in the small jar of the mixie once. Add the beans and pulse until coarse. Heat oil in a pan and add the ground beans mixture and cumin powder. Cook in medium heat sprinkling little water. When the mixture is almost cooked (shouldn't be mashed) add sugar, coriander leaves and salt. Remove from heat and add coconut and lemon juice. Mix well and allow to cool completely. I made the filling earlier in the day and refrigerated until evening.
Mix the flours, salt and oil. Add water little by little and make smooth, stiff dough. Make 12 equal sized balls of the dough. Also divide the filling into 12 portions. 
When ready to fry the kachoris, heat oil for deep frying. Roll one dough ball into a 3 inch disc. Place one ball of the filling and bring the corners of the flattened disc together and pinch to make a covered ball. You could pinch of excess dough if desired. This is how the kachoris are made in gujarat. If you want the flattened kachoris after covering the filling roll it ever so slightly to form a thick disc. Do not apply too much pressure while rolling out which may cause the outer covering to tear and expose the filling.
When the oil is hot, reduce the heat to medium and gently slide the kachoris to the oil. Cook in medium heat, flipping over once or twice until the kachoris are golden brown. Serve hot with ketchup or mint/tamarind chutney.
Notes:
It is important to make the dough stiff but pliable. Loose dough will absorb more oil which is not desirable. 
Fry the kachoris in medium heat slowly until the kachoris turn light brown. The oil should not be in high heat because it will cause the outer covering to brown faster and the insides will be under-cooked. 

Thursday, October 16, 2014

Thavala Vadai / Mixed Dhals Vada | Snacks Recipes

When I was in India for Summer, I wasn't thinking about clicking anything for the blog :). I had scheduled some posts, so I wasn't even thinking about this space. I had planned to learn more cooking from grandma, aunts and mother-in-law but nothing much happened with my 2 yr old running around. One day my MIL made this thavala vada and asked me if I would want to click some pics for the blog.. How would I not?? So When my lil one was napping, I sneaked to the drawing room to take some pictures. I was really excited to click these pictures on a fresh banana leaf, which is like a dream come true for me, a South Indian living in the US.
Ingredients:
MIL used the traditional veesam padi (1 cup here )for this, it is approximately 60 ml
Chana dhal - 1 cup
Toor dhal - 1/2 cup
Whole urad dhal  1/2 cup
Moong dhal - 1/2 cup + 1 tbsp
Raw rice - 1 tbsp
Green chillies - 3
Red chillies - 2
Hing / Asafoetida - 1/2 tsp
Curry leaves - a few
Fresh Coconut - cut into tiny pieces - 2 tbsp (Can use fresh grated coconut too)
Salt - to taste
Oil - 1 tsp + more for deep frying
Mustard seeds - 1/2 tsp

Method:
Wash and soak chana dhal, toor dhal, urad dhal, rice and 1/2 cup moong dhal for 1 hour. Wash and soak the 1 tbsp of moong dhal separately. Drain the dhal mixture completely. Place in a blender with chillies, asafoetida and salt. Grind coarsely. Add the coconut, curry leaves, moong dhal and mix. Heat 1 tsp of oil and splutter the mustard seeds. Pour over the dhal mixture. Heat oil for deep frying. Take lime sized dhal mixture and form thick patties. Deep fry until golden brown. Serve hot with chutney.

Thursday, May 29, 2014

Masal Vada / Cabbage Dhal Vada | Snacks Recipes

When it comes to deep-fried snacks, LO is just like his Dad.. Loves 'em. I made this crunchy crispy vadas for lunch the other day. It was a great combo for the Mysore Rasam (recipe coming soon) I made. I used a combination of chana dhal and split moong dhal and added cabbage in the place of regular onions. 
Ingredients:
Inspired from here
Dhal measurements in 160 ml cup; Makes 12 vadas
Chana dhal - 1/2 cup
Moong dhal - 1/2 cup
Dry Red chillies - 2
Fennel seeds - 1 tsp
Asafoetida - 1/2 tsp
Cabbage, chopped fine - 1-1/2 cups (can substitute onions)
Green onions, chopped - a handful (optional)
Coriander leaves, chopped - a handful
Salt - to taste (see notes below)
Oil - for frying

Method:
Wash and soak the dhals together for 45 mins to an hour. Drain completely and grind coarsely with red chilli, fennel seeds and asafoetida. Mix with salt, chopped cabbage (or onions), green onions and coriander leaves. Heat oil for deep frying. Make small patties and deep fry until golden brown on the outside and cooked through in the inside.
Notes:
Add salt just before frying. If not frying immediately after grinding, cover and refrigerate until use.
Linking this up to Vegan Thursdays.

Monday, January 6, 2014

Seppankilangu Masala Varuval

This is one of those addictive, no-one-can-eat-just-one kind of dish. Seppankilangu Masala Varuval (Taro Masala Fry) is a spicy shallow fried version of the arbi/taro root and is a tasty side dish for dhal rice or curd rice. 
I also have posted another version of this Seppankilangu Varuval earlier.


Ingredients:
Serves - 2-3
Taro / Arbi / Seppankilangu - 6
Corn Starch - 2 tsp
Sambar Powder - 2 tsp
Curry powder - 1 tsp
Cumin powder - 1/2 tsp
Coriander powder - 1 tsp
Turmeric powder - 1/4 tsp
Asafoetida - 1/4 tsp
Salt - 1/2 tsp or to taste
Oil - 2 tbsp

Method:
Pressure cook the arbi for 2 whistles. When done, drain, cool and remove skin. Slice into thin discs and set aside. Mix the rest of the ingredients with water to make a thin paste (except oil). The paste should be in a batter consistency, not too thin. Heat 1 tbsp of oil in a flat, wide non-stick pan, coating the pan evenly. Dip the cut arbi discs into the spice paste and shake off excess. Place in the heated pan. Repeat for the other pieces until pan is full. Fry until it is golden. Flip over and continue to fry the other side. When full done and crispy remove and drain on a kitchen tissue paper. Repeat for the next batch with remaining oil if needed. This fry is a great snack in itself, but I served with sambar rice.

Wednesday, November 13, 2013

Easy Instant Unniyappam / Banana Kuzhi Paniyaram / Rice Flour Sweet Appam

All fond memories are made through food. Or at least the food enthusiast in me try to connect memories with food. There is a memory associated with these unniyappams. I first tasted unniyappam in one of dad's friends' home when I was around 10. They are a sweet family from Kerala and Aunty would make this every single time when we visited. I still remember how fondly she used to prepare these appams for us kids. Then they moved back to Kerala after Uncle retired and we all moved to different cities for work. But then the world has shrunk these days due to the advent of social media and we have got a chance to reconnect with our old friends. It is through Facebook that we reconnected with their family. I chanced upon to see her daughter, wishing her mother on her birthday. I too conveyed my wishes to Aunty and the foodie in me made a mental note that I have to make her unniyappams one day.
Ingredients:
Serves - 4 for snack
Rice flour - 2 cups
Jaggery - 1/2 cup (tightly packed) - see notes below
Banana - 3 small or 2 big ones - mashed
Salt - a pinch
Cardamom powder - 1/4 tsp
Baking soda - a big pinch
Water - 1/4 cup + more to make the batter
Oil - for frying in the pan

Method:
Mix jaggery in 1/4 cup of water and heat until it is melted. Filter with a fine mesh strainer. Mix the jaggery syrup with rice flour, mashed bananas and water to make a batter of pouring consistency but slightly thicker than dosa batter. Stir in salt, cardamom powder and baking soda. Heat the paniyaram pan / abelskiever pan in medium-high flame. Pour about 1/4 tsp of oil in each kuzhi (indentation). Pour enough batter into each kuzhi to fill. When little bubbles start to appear on the top, flip using a toothpick or chopstick to about halfway. After about another minute, flip again completely. At this stage all the sides of the appam should be golden and well-formed to a round shape. Reduce the heat to medium and continue to cook until the insides are cooked through. Repeat for the rest of the batter.
Notes:
1. The amount of jaggery used here yields a mildly sweetened unniyappam. For sweeter ones use 3/4 to 1 cup of jaggery. The water for making syrup should be 1:2 with jaggery.
2. Traditionally the unniyappam is made by soaking rice and grinding to form a batter with jaggery and banana. Another point to make it traditional is to add small pieces of fresh coconut fried in ghee and black sesame seeds to the batter.

Friday, November 1, 2013

Ribbon Murukku / Ottu Pakoda | Indian Festival Recipes

Ribbon Pakoda aka Ribbon murukku are these super addictive crispy snacks grandma makes for Diwali. These lacy crunchies hold good for the saying "no one can eat just one" and we would have stuffed us well before even she finishes making these. This recipe here is for a spicy ribbon pakoda. Just skip the chillies part for a non-spicy one.
Ingredients:
Measurements in standard cup (240 ml) measurements; 
Soaking time - 4 hours; Preparation time - 15 mins; Cooking time - 90 mins
Parboiled Rice / Idli Rice - 2 cups
Roasted Gram dhal flour / Dalia / Pottukadalai maavu - 2 cups (see notes below)
Asafoetida / Hing / Perungayam - a big pinch
Butter - 1/2 tbsp
Salt - 1 tsp
Oil - for deep frying
Grind to a paste:
Green chillies - 6
Cinnamon - a mall piece
Cloves - 5
Ginger - 1/4" piece
Garlic - 6 cloves
Fennel Seeds /Saunf - 1/2 tsp
Method:
Wash and soak the rice for 4 hours. Grind to a smooth batter with salt with a pouring consistency. Grind the chillies and spices with about 1/4 cup of water. Filter this spice mixture to extract the juice. Add the butter to the gram dhal flour and rub to incorporate well. Add the rice batter to gram dhal flour and mix well. The mixture would be little dry. Now add asafoetida and sprinkle the chilli juice and knead well to form a smooth dough. Heat oil for deep frying. Prepare the murukku press by placing the ribbon murukku attachment. Fill with dough and pipe directly into the hot oil. Flip over midway and fry until the bubbles around the murukku in the oil subside. Remove and drain into a paper towel. When cool store in an air-tight container.
Notes:
Process 2 cups of roasted gram dhal to a fine powder. Pass it through a sieve and remove the bigger pieces. Measure out 2 cups of the flour.
You could also use about 1 tbsp of chiili powder instead of the green chilli juice. Use water to make the dough if using chilli powder. These murukkus will be darker than the ones in the picture.
Linking these up to Only - Diwali Snacks event by Pari and Sowmya; Taste of Tropics - Chiles and Vardhini's Diwali Bash; Spotlight - Festive Treats.
Only Diwali treats

Saturday, October 12, 2013

Mirapakaya Bajji / Stuffed Milaga Bajji

Do you remember the friends we visited for dinner in my German Chocolate Cake post. They are a sweet couple and the dinner was super awesome. Now, DH and spicy foods are two entities who cannot be separate. And needless to say when they made Andhra-style Mirapakaya bajji for appetizers, he was in cloud nine. Seeing how much he loved the bajji, I duly asked for the recipe and they were happy to share.
Ingredients:
Serves - 5
Serrano Peppers / Bajji Milagai - 10 (Choose the light colored ones and definitely stay away from the dark ones)
Besan / Chickpea flour - 2 cups
Rice flour - 1/3 cup
Ginger garlic paste - 1 tsp
Chilli powder - 1 tsp or to taste
Salt - to taste
Baking soda - a big pinch
Asafoetida - a pinch
Water - as needed
Oil - for deep frying
For the Stuffing:
Tamarind paste - 2 tbsp
Coriander powder - 1 tsp
Ginger garlic paste - 1 tsp
Salt - to taste

Method:
Using a small paring knife, carefully slit the peppers on one side with the stem intact. Use the knife or a sharp spoon to scrape out all the seeds. Set the peppers aside and wash your hands with soap and water. Mix the ingredients for stuffing and place about 1/2 tsp of of it in each pepper. Heat the oil for deep-frying. Meanwhile, mix the batter for bajji without any lumps. The batter should be of dripping consistency. Take the peppers by the stem and dip in the batter to coat all sides. Gently drop in the oil and cook in medium-high heat until golden brown. Remove from heat and serve with chopped onions and coconut chutney.
Linking this up to Nupur's What's with my Cuppa?; Birthday Party.

Wednesday, June 12, 2013

Sweet Potato Fry | Indian Side Dishes

Grandma used to make little dumplings with boiled sweet potatoes with grated coconut and ghee for use for evening snack. That was the only way I had sweet potatoes until I started cooking. I started incorporating it in parathas, baked chips with them and my recent favorite is this simple stir fry. It is a little on a sweeter side, so would make a good side for a spicy main course.
Ingredients:
Serves - 2
Sweet potato - 1 medium - cut into 1/2" pieces
Salt - to taste
Cumin powder - 1/2 tsp
Chilli powder - 1/2 tsp - 1 tsp (based on spice level)
Oil - 2 tbsp
Method:
Heat oil in a pan and add the cut sweet potato pieces. Mix and fry for about 10 minutes mixing occasionally. When a crust forms, add the spice powders and salt and continue to cook in med-high flame until it is soft on the inside and crispy on the outside. Mine took about 10 minutes after adding the spice powders. Serve as a snack or side.
Notes: It is good to cut the sweet potato into same size to help in even cooking

Monday, April 29, 2013

Whole Wheat Pita Chips

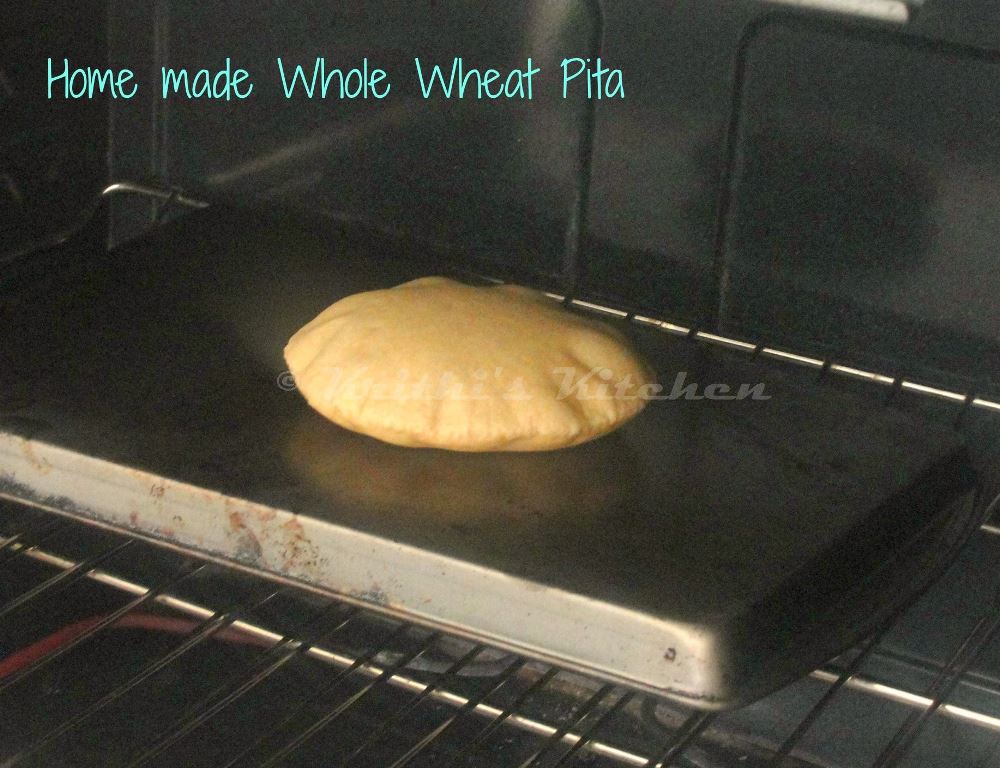
Every cuisine has its own variety of bread. Though I was used to Indian breads like Roti, Poori, Chapathi, Paratha, Naan, Kulcha I did not know there are so many other breads. My knowledge of non-Indian breads were limited to white and brown (wheat) breads until I came to know about many other varieties like foccacia, ciabatta, brioche.. well the list is endless. Being a hardcore foodie and a passionate food blogger I love to explore other cuisines and try out the dishes whenever I can. It was one fine day when I tried these Home made Pita Bread from Denny's space. May be I did something wrong with the measurements the first time, the dough was very loose and wasn't perfect. The next time I tried, the Pita came out perfect but it was the chips that was too thick and hard. Apparently I hadn't separated the layers before slicing to bake chips. And as they say "third time's the charm", this time both my bread and chips came out perfectly. The process is little intensive but when you taste these homemade beauties they are worth the effort.
For the Pita Bread
Ingredients:
Yield - 8
Whole wheat flour - 3 cups
Salt - 1 1/2 tsp
Extra virgin Olive oil - 1 1/2 tbsp + more for brushing
Honey - 1 tsp (can substitute sugar)
Active dry yeast - 1 pkt (approx 2 1/4 tsp)
Water - 1 1/2 cups
Method:
Whisk the flour and salt together. Add 1 1/2 tbsp of olive oil and mix together until it is well incorporated. Heat 1/2 cup of water until lukewarm. Add honey and the yeast. Mix and set aside to proof the yeast. When the yeast is frothy add this yeast mixture to the flour and knead to form a dough using the remaining water. Use water as needed to form a smooth pliable dough. Coat another bowl with oil and place the dough ball (coated with oil) and cover. Set aside in a draft-free space to rise. I set aside for 2 hours to fully rise to double the original volume.
When risen, punch down and form equal sized balls out of the dough. Cover with a damp cloth and set aside again to proof for 15 mins. Place a cookie sheet inside the oven in the center rack and preheat it to 500 F. In a rolling board, place one dough ball and roll to form a flat bread (about 6" diameter). Transfer to a plate and cover with damp kitchen towel until other balls are rolled out. Repeat for other balls. When the oven is heated, place one rolled out bread and bake for about 3 to 5 minutes or until puffed. Remove carefully with tongs and brush with some olive oil. Allow it to cool slightly before being served. Can be served as pita bread or pita pockets for falafel.
Notes for Pita Bread:
You may or may not need 1 1/2 cups of water. Use as required.
For good leavening, allow the dough to rise 3 times. One as a whole dough ball, second, after making small balls when the oven is preheating. Third, After rolling out the bread (a couple of minutes is good).


To make Pita Chips
Ingredients:
Serves - 2
Pita Bread - 2
Olive oil - 2 tbsp
Salt & pepper - to taste
Method: 
Preheat the oven to 400 F / 200 C. Line a cookie sheet with aluminium foil. When the bread is still warm cut it into two and gently pull apart the cut part to form a pita pocket. Use a knife to separate the pockets. Cut into wedges. One pita bread can be made as 16 or 12 wedges. Coat the wedges with oil, salt and pepper. Transfer to the cookie sheet and arrange so that the wedges do not overlap. Bake for 10-15 mins until slightly golden and crisp. Serve warm or in room temperature with hummus or any dip of your choice.
Sending this to Nayna's Flavours of Greece event; Made with Love Mondays; Swathi's Favorite Recipes event.

Monday, April 15, 2013

Soya Chukka / Soy Chunks Spicy Stir-Fry | Indian Soy Recipes

I picked up this bag of soy chunks on my grocery shopping last time, hoping to make something as a protein-rich snack. Not being a vegetarian myself I was not crazy about these when I was young. But tastes change as we grow, don't they. I thought I would give it another try and this chukka is my first attempt. When I came to know about Radhika's Tickling Palates being the featured blog in Tried & Tasted this month I knew I was definitely going to participate. Her's is a lovely space with so many homestyle and authentic recipes. I was going through her Recipe Index and guess what I found.. This easy to make Soya Chukka! I bookmarked it immediately and tried it pretty soon. This is great as an evening snack or as a side dish for rice or roti.
Ingredients:
Serves - 2; Preparation Time - 30 mins
Soy Chunks - 1 cup
Pearl onions / Sambar onions - 12 (peeled and halved)
Ginger garlic paste - 1 tbsp
Red chilli powder - 1 tsp (1 tsp if using kashmiri, I used spicy chilli powder so used only 1/2 tsp)
Coriander Powder - 2 tsp
Turmeric Powder - 1/2 tsp
Tamarind extract - 2 tbsp (optional)
Pepper powder + Cumin powder - 1/2 tsp (recipe called for crushing fresh pepper and cumin seeds but I took a shortcut)
Cilantro / Coriander leaves - a little for garnish
Salt - to taste
Oil - as needed

Method:
Heat about 5 cups of water in a saucepan. When it comes to a rolling boil, remove from heat and add the soy chunks. Cover and set aside for 30 minutes. Drain and squeeze the excess water and repeat rinse and squeeze with three exchanges of water. After final rinse and squeeze cut the soy balls into small pieces as desired. Set aside. Heat 3 tbsp of oil in a kadai and saute the pearl onions until pink. Add the ginger garlic paste and saute in medium heat for 2 minutes. Now add the spice powders (except pepper + cumin) and fry for a couple more minutes. Add 2 tbsp of oil (if the onion mixture is dry) and add the cut soy chunks with salt  and tamarind extract and mix well. Cook for 5 minutes or until the soy chunks are cooked through. Garnish with coriander leaves and serve hot as a side for rice.
Notes:
1. Definitely use pearl onions. Substituting with regular onions would not even be close.
2. I am planning to skip the tamarind next time.
Linking this to Tried & Tasted event by Lakshmi.

Thursday, March 14, 2013

Pad Thai Tofu Lettuce Wraps / Vegetarian Lettuce Wraps

Being an Indian, I love the other Asian cuisines very much since the complexity and levels of flavours are so similar in all of them. Grazing through my menu one could see that I love Thai food and tried quite a number of varieties. One of my favorite go-to dish in thai restaurants is Pad Thai (meaning "Fried, thai style"). While the authenticity of the origin of the dish is still in question, I do not mind where it originated given it being tasty. Another cuisine I love is the Chinese and the PF Chang's Tofu lettuce wraps is an inspiration for making this dish. This recipe is vegetarian and Vegan too.
Ingredients:
Serves - 2 as a meal; 4 as an appetizer
Firm Tofu - 1/2 block
Lettuce wraps - as needed (I used iceberg lettuce)
Peanuts - 3 tbsp
Scallions / Spring onion - cut on a bias - for garnish
Lemon juice - for garnish
Oil - 2 tbsp
For Tofu Marinade:
Low sodium Soy sauce - 3 tbsp
Agave syrup - 2 tbsp (see notes below)
Red pepper flakes - 1 tbsp
Grated ginger - 1 tbsp
Salt - to taste
For Sauce:
Tamarind extract -  3 tbsp (see notes below)
Agave syrup - 1 tbsp (see notes below)
Low Sodium Soy sauce - 2 tbsp
Red pepper flakes - 1 tbsp
Salt - as needed
Method:
Press the tofu and remove excess water. Cut into tiny pieces or into desired size. Mix the ingredients for marinade in a ziploc bag and put the cut tofu in the bag. Close the bag and mix well for the marinade to coat the tofu pieces. Store in the fridge until ready to use. Anywhere from 4 to 24 hours is good. 
Dry roast the peanuts until toasted. When done, allow to cool, remove skin and crush into little pieces. Mix the ingredients for sauce and do a taste check. Balance out the flavours according to your palate.
When ready, heat oil in a wide pan and add the marinated tofu. Let it sear for a couple of minutes in med-high heat and then toss. Allow it to sear for couple more minutes and then transfer to a plate. Add the sauce to the same pan and allow it to boil. Reduce the heat and add the tofu and mix. Remove from heat after about 3-5 minutes and garnish with crushed peanuts, lemon juice and spring onions. Serve over lettuce cups.
Notes:
1. I used big gooseberry sized tamarind to make the extract. If using ready to use tamarind paste, mix about 1 tsp of the extract with water to make 3 tbsp.
2. I have used salt very sparingly since the soy sauce already has salt.
3. I used agave nectar for a mellow sweetness. Feel free to substitute with brown sugar or honey. Increase the amount though, since agave is sweeter than sugar or honey.
Sending these beauties to PJ's Celebrate Women's day; Susan's MLLA#57; Taste of the Tropics - Ginger; Flavours of Cuisines - Chinese;

Friday, December 21, 2012

Sweet & Spicy Baked Tofu - Asian Style

Tofu has been our favorite ingredient when it comes to quick snack. There are certain foods which DH is not very fond of. One of them is Tofu. At least I thought so until he actually liked something with tofu. It was when we went to a Thai place near our house before sometime. He did enjoy the vegetables with tofu served with rice. Then I "discovered" why he liked them. It was because it was crispy. And there started my quest for making tofu appealing to him. Fry or bake. Mission accomplished. This time I made a simple marinade and baked the tofu. It tasted almost close to the Organic Tofu which we tasted in Noodles and Company. Also check out my Tofu Golden triangles.

Ingredients:
Extra firm tofu - 1 block
Brown sugar - 1/4 cup
Low sodium Soy sauce - 1/4 cup
Garlic - chopped fine - 3 tbsp
Ginger - chopped fine - 2 tbsp
Cilantro / Coriander leaves - chopped fine - 2 tbsp
Crushed Red pepper flakes OR Finely chopped dry red chillies - 1/2 tsp to 1 tsp (based on your spice level)
Sesame oil - 1 tsp
Salt - a tad bit
Method:
Press the tofu and remove excess water. Cut into little cubes or fingers. Mix the ingredients for the marinade in a ziploc bag. Add the tofu and mix well. Place it in the refrigerator for 4 hours to 24 hours turning over every couple of hours. When you are ready to bake, preheat the oven to 350 F. Place the tofu cubes in a foil lined cookie sheet which is sprayed with oil. Bake for 40-50 mins until crispy on the outside. Brush the remaining marinade over the tofu pieces midway through the baking. Crispy sweet and spicy tofu is done! 
Serve over fried rice, noodles, stir fries or just dig in with a fork like I did.
Linking these up to..
Know your Sweetness - Brown Sugar
Quick and Easy Recipes
Bake Fest #14
SYF & HWS - Ginger event by Anu
Spotlight - Healthy Baking
[SYF%2526HWS%2520-%2520Ginger%255B4%255D.jpg]

Friday, December 14, 2012

Pumpkin Pasties from Harry Potter

For all the Harry Potter fans out there... This is for you. Well, not a big fan of Potter? no problem you would love this too. I and DH are big fans of Harry Potter. If it is a boring weekend, not a great weather and nothing good on TV we will make it a "Harry Potter Weekend". We will watch all the eight HP movies back to back. A great way to spend the weekend isn't it? 
Pumpkin pasties are sold in the trolley run by Honeydukes express on the Hogwarts express. In the movie Harry Potter and the Goblet of Fire, Harry first meets Cho Chang in the train when she buys pumpkin pasties. I have never thought on how it would taste like back then. It was recently when the foodie in me made me to try this lovely delicacy. I did some research and arrived at this recipe. So happy that it turned out awesome in the first attempt. This is a totally egg-less fare (when milk is used to brush the top) and super easy to make. If using home-made pumpkin puree, press out to remove extra water. Hooray, then you would get pumpkin juice, another Hogwarts specialty.
Ingredients:
Makes 8-10 pasties
For the Never Fail Pie Crust:
Adapted from Fine Cooking Magazine
All purpose flour  - 1 & 1/3 cups
Butter - 8 tbsp (cold, cut into cubes)
Sugar - 1 tsp
Salt - 1/2 tsp
Ice Cold water - 3 to 4 tbsps
For the filling:
Pumpkin puree - 1 cup (canned or home-made)
Light Brown Sugar - 1/2 cup + 2 tbsp
Ground Cinnamon - 1/2 tsp
Ground Ginger - 1/4 tsp
Ground Nutmeg - 1/4 tsp
For Brushing:
Egg - 1 slightly beaten and mixed with a tbsp of water or milk as required

Method:
Place all the ingredients for the crust in a blender or food processor except the ice water. Pulse for a couple of times until the butter almost disappears. Now add the ice water 1 tbsp at a time and pulse until the dough comes together. Remove the dough and pat to form a solid mass. Wrap in a cling-wrap and pop it into the refrigerator for about 2 to 4 hours.
Mix the ingredients for the filling in a pan in low heat until the sugar melts, just a couple of minutes. Allow to cool.
Preheat the oven to 350 F. Line a cookie sheet with parchment paper. Thaw the crust in room temperature for 30 minutes. Flour a board and place the dough on it. Roll into about a 1/8 inch thick. Cut into little rounds with a cookie cutter or any bowl with sharp edge. Roll the cut out dough still more thinner. Place about a tablespoon (or more) of the filling on one half of the rolled dough. Fold over the other half and crimp the edges with your finger or fork. Transfer carefully to the cookie sheet. Make the other pasties similarly. The dough leftover from the cut dough can be made into a ball and rolled over again to be cut. Brush the top of the pasties with egg or milk and bake for 30-40 mins until golden brown on the outside.
Serve warm.
Note: 
1. Use a pastry cutter or two forks to crumble the butter if you are not using the food processor.
2. The amount of water needed for the dough depends on the humidity in your area. More the humidity, lesser the water. I used about 3.5 tbsps.
3. The sweetness in the filling is just right. You could make it more sweet per your taste buds.
4. Play around with the spices and make the filling spicy if you wish. There are no set rules.
5. This can be made totally egg-free by brushing with milk for browning.
Sending these baked beauties to the following events..
Know your Sweetness - Brown Sugar event by Jags
Serve It - Original Recipes from home event my me and Denny
Kid's Delight - Story Book Special
Merry Christmas Celebrations
Favorite Recipes - Christmas event
Lets Cook - Edible Gifts


Tuesday, September 18, 2012

Babycorn Satay with Peanut Sauce - Guest Post by Prathima of Prat's Corner

Prathima from Prats Corner is this month's guest host in my kitchen. Prats and I are real "virtual" friends. Though it may sound oxymoronic, it is a true statement. We got to know each other through the blogging world and Facebook and became good friends. Emails and chats kept us connected. I love her elegant blogspace and unique dishes. My favorite is the authentic Davanagare Benne Dosa. I completely adore her style of writing which makes her posts enduringly interesting. She recently celebrated 1,00,000 hits in her space. Prats Corner is not just recipes but also about her other interests. Her charcoal painting of her grandpa is just awesome. Here is Prats in her own words.

"We sometimes encounter people, even perfect strangers, who begin to interest us at first sight, somehow, suddenly, all at once, before a word has been spoken" ~ Fyodor Dostoevsky

Some people you meet in the journey called 'life', you will take a little while to get acquainted to. And then with some its an instant connection! You go on and on chatting with this newly met friend all about your past, your dreams maybe or your opinions and anything about you find interesting. And in the end you say it was like a reunion with an old friend!

I now know that distance cannot act as barrier between friendship, nor does difference in culture or language. This reminds me of my grandmother who by conversing in  Kannada and very few words of English thrown in between made good friendship with a German lady. And this lady simply adored my grandma! Essence of  a good friendship leans more towards feelings, emotions and the bond we share with the other person.


I have no idea what plays a role in this 'instant connection' between two strangers - is it the positive vibes or similar interests or fate?? Whatever the reason, this stranger is now your new found friend, a treasure worth cherishing for ever.

One such special person or my new found treasure in Krithi of Krithi`s Kitchen. She is friendly, a software engineer turned foodie with a fabulous food blog loaded with delicious, elegant, interesting recipes! Not to forget - she is also a good photographer!  She is someone I came in contact with through the food blogging world. She is someone I have not met personally and yet it does not seem that way! Just few casual messages exchanged and now she is a good friend of mine!


And I was truly delighted when I was asked to do a guest post on her blog - Krithi`s Kitchen. I picked a Thai starter recipe - Satay for this guest post which turned out to be delicious & more-ish!

What is a Satay?

Satay (pronounced - SAH-tay) is a popular South East Asian starter dish. Many articles on satay mention Indonesia as being the origin of satay. But it has now become popular in other South-Asian countries like Singapore, Malaysia and particularly Thailand. Thai cuisine being popular worldwide has led to considering this dish as originated from Thailand.

One or few main ingredients - be it vegetable chunks, tofu, meat, fish are seasoned and threaded onto satay sticks or bamboo skewers. They are then grilled or barbecued over a charcoal over wood fire. An authentic satay will have turmeric added to the marinade, giving it the characteristic yellow shade and will have a smoky flavor, the result of cooking over charcoal.


The difference between the satay recipes of these South East nations is mainly in the accompaniment served along with the barbecued ingredient and also in the way the vegetable/ meat is cut.

One popular accompaniment to the satay is the spicy peanut sauce served in Thailand. The sauce is generous in its spice level. Tang from the lemon and a hint of sweetness from palm sugar make this  a lip smacking dip!

In Singapore satay is sold in food courts, by street vendors and in upscale restaurants. The popular one here is the Chicken satay.

Different parts of Malaysia have their own versions of this popular appetizer. One popular veraion is the Sate Kajang where a sweet peanut sauce and some fried chilli paste is served along side with barbecued meat. Another version is the sate lok-lok from Penang where the dip is a sweet dark sauce or a chilli sauce. Sate celup is a verion where the satay is cooked in boiling peanut sauce.

The country where this popular appetizer originated - Indonesia, serves satay with soy based dip.  There are several versions of satay in this country. One popular one is the Sate Madura where meat is served with sweet soy sauce and eaten with rice or rice cakes wrapped with banana or coconut leaves. Such rice cakes are called ketupat. Few more accompaniments to other satay versions include - sambal (chilli paste), pineapple based satay sauce, sliced shallots or sliced fresh chillies.

Baby corn and vegetable satay on satay sticks :


Spicy, sweet peanut sauce with a hint of lemon :


BABY CORN SATAY

Ethnicity : Thai / Course : starter

Makes 12 pieces

INGREDIENTS

Baby corn – 12 whole pieces
Onion – 1, medium
Red capsicum – 1, medium

Vegetable oil – 2 tbsp, to pan fry vegetables

Satay sticks – 12+2 or as needed, soaked in water for 5 mins

For Marinade :
Soya sauce – 1 tbsp
Lemon juice – 1 tsp
Ginger garlic paste – 1.5 tsp
Brown sugar – 1 tsp
Honey – ½ tsp
Salt – 1 tsp/ to taste

For Peanut Sauce :
Vegetable oil – 1 tbsp
Onion – 1, small
Ginger – ½ “
Garlic – 4 cloves
Soya sauce – ¾ tbsp
Peanuts/ groundnuts (without skin) – 6 tbsp
Coconut milk – ¾ cup (tetra pack or fresh thin extract)
Lemon juice – 1 tbsp
Lemon rind – ½ tsp
Red chilli powder – 1 tsp OR 1-2 chopped fresh red chilli
Honey OR brown sugar – 1 tbsp

For garnish – red chilli flakes (optional)

METHOD

Prepare the vegetables – Wash baby corn, cube onion and red capsicum. Blanch baby corns in salted boiling water for 2 mins OR pressure cook for up to 2-3 whistles (open lid when pressure drops).

In a bowl combine the above vegetables, marinade ingredients. Toss. Set aside to marinade for 15 to 20 mins. Pierce all baby corns into satay sticks (1 per stick). Thread the other remaining vegetables between 2 to 3 separate sticks

Heat oil in a grill pan/ griddle. Place the sticks with vegetables onto the griddle. Pour any excess marinade on top of vegetables.

Cook the vegetables, turning sticks in between to cook the vegetables evenly on all sides. Cook till baby corn is brown and caramelized , onion-capsicum a bit charred on the edges. Remove and set aside.

For the sauce –  Chop onion for the sauce. Chop ginger, garlic. Grind the peanuts to a coarse powder, then add 1-2 tsp water and grind to smooth paste. Extract coconut milk if using fresh.

Heat oil in a pan, sauté onions till transparent. Add ginger, garlic, sauté for 1 min.

Add soya sauce, peanut paste, 3 to 4 tbsp water and stir. Add coconut milk, salt, honey/ brown sugar, chilli powder, lemon rind. May stir with a whisk if peanuts form lumps. Stir and simmer for 10 mins.

Lastly add lemon juice. Stir and remove sauce from heat.

To serve – Arrange the vegetable satay on sticks on a serving plate. Serve the sweet, spicy, tangy, nutty peanut sauced on the side. May sprinkle with red chilli flakes if desired. Serve hot!

NOTES

1. Instead of above vegetables, you could make satay from tofu, button mushrooms, paneer (cottage cheese), green, yellow and red capsicum.
You could serve cubed cucumbers too but no need to marinade or grill them. Just thread cubed cucumber onto skewers and serve with the peanut sauce.

2. Instead of the above marinade, you could marinade the vegetable/tofu/mushroom/paneer with few tablespoons of the peanut sauce for 15 mins. Then grill as above. Serve hot with remaining peanut dip.

3. You could also add coconut milk made from coconut milk powder.

4. You could also serve this peanut sauce with boiled/teamed/grilled vegetables.

5. You may also add chopped lemongrass stalks along with coconut milk. Then reduce the amount of lemon juice.