Thursday, June 26, 2014

Peach Buttermilk Pancakes (eggless) with Cherry Compote | Breakfast Recipes

There is nothing exciting for a foodie to pick up fresh fruits from the farmer's market stands. Summer is in full bloom here and so are the stoned fruits. Mangoes, Nectarines, Peaches, Cherries and Apricots have made their way to the market. Last week I came home with a bounty of farmer's market produce.. Peaches, Cherries, Snake gourd, Cluster beans, Okra and more. The cherries I got from the farmer's market are super sweet and make a great snack. 
Eating seasonal feels really good. It also feels great when you get your picky eater eats seasonal fruits, especially sneaked in his favorite pancakes.

Ingredients:
Makes 6-7 pancakes
For the Peach Pancakes:
All purpose Flour / Maida - 1 cup
Sugar - 1 tbsp
Salt - 1/4 tsp
Ground Ginger - 1/2 tsp
Baking powder - 1 tsp
Baking Soda - 1/2 tsp
Buttermilk - 1 cup + 2 tbsp
Vanilla - 1 tsp
Butter, melted - 1 tsp
Oil - 1 tbsp
Fresh Peach - 3/4 cup, chopped fine
For the Cherry Compote:
Fresh Cherries - 1 cup (halved, pits removed), choose dark ones, they are sweet
Maple syrup - 2 tbsp
Lemon juice - 1/2 tbsp
Water - 1/4 cup
Method:
For the Cherry Compote:
Boil the water, maple syrup and lemon juice until bubbly. Add the halved cherries and cover and cook in medium heat for 10 minutes, stirring occasionally. Allow to cool and refrigerate until use.
For the Pancakes:
Whisk the flour, sugar, salt, ginger, baking powder and baking soda together well. Mix 1 cup buttermilk, vanilla, butter and oil in a separate bowl. Pour the buttermilk mixture over dry ingredients and mix with a fork just until no flour remains. A little lumps are ok. If the batter is too thick add the remaining 2 tbsp of buttermilk and fold in the chopped peaches. 
Heat a griddle in medium heat and pour 1/4 cup of the batter. When bubbles start appearing flip the pancakes over and cook another minute or two. Repeat with the remaining batter and make pancakes. Serve topped with Cherry Compote..

Thursday, June 19, 2014

Banana Oatmeal Peanut Butter Muffins | Infant & Toddler Food Ideas

Planning for a make-ahead snack for my LO always seems to be challenge. The challenge does not lie in making something but making something he likes. He is turning to be more picky (ahem, guess like who??). It is easy to count the number of things he likes these days. This is one muffin which he actually liked, so I decided to post under Baby and Toddler Foods section. This muffin is butter-free. The peanut butter acts as a butter substitute and makes it super peanut-buttery. I can't talk enough on the good-for-you factors in these muffins. With Oatmeal, whole wheat flour, peanut butter, banana and cinnamon it talks for itself.
Ingredients:
Makes 12 regular sized muffins
Adapted from recipe here
Old fashioned / Rolled oats - 3/4 cup
All-purpose flour / Maida - 3/4 cup
Whole wheat flour - 1/2 cup (can substitute AP flour)
Cinnamon - 1 tsp
Salt - 1/2 tsp
Baking powder - 1 tbsp
Ripe Bananas - 2 (about 1 cup mashed)
Peanut butter - 1/3 cup
Brown sugar, packed - 2/3 cup (see notes below)
Egg - 1 (room temp)
Milk - 1-1/4 cups (room temp)
Vanilla extract -  1 tsp
Optional Cinnamon Sugar topping:
Sugar - 2 tbsp
Cinnamon - 1 tsp
Method:
Preheat the oven to 375 F. Line a muffin pan with liners. Whisk the flours, oats, cinnamon, salt and baking powder well. In a large mixing bowl, add the bananas and mash them with a fork. You may really do not want a hand mixer, a whisk even. All my mixing was done with the humble fork. Add the peanut butter and egg to the mashed bananas and mix well. Next add the sugar and mix until it dissolves. Add the milk, vanilla and mix again. Now add the flour mixture in 3 additions and mix until no trace of dry flour remains. Divide equally among the muffin cups and bake for about 18-20 minutes.
Sprinkle with the cinnamon sugar topping when still warm.
Notes: 
These muffins are not overly sweet and was just right. If you want sweeter muffins use 3/4 cup of brown sugar.

Thursday, June 12, 2014

Mysore Rasam | Rasam Recipes

Making a meal was not an easy task for our mums and grandmothers. For a simple South-Indian meal it starts with making a Sambar or kulambu, Rasam and a vegetable stir-fry (poriyal). Getting the rice ready and making sure the yogurt (curd) is set is a routine task in making lunch. Yes we make our yogurts at home. Among the fast-paced life now we rarely get time to sit-down for a proper lunch. Things are grab-and-go these days and some good old recipes are forgotten. It has been a long time since I had even heard the name of this rasam recipe but I distinctly remember the taste and aroma it has. I set out to make this rasam for a simple weekday lunch.


Ingredients:
Toor dhal - 1/3 cup
Tamarind - size of a small lime
Tomato - 1
Turmeric powder - 1/4 tsp
Coriander leaves - for garnish
Salt - to taste
Tempering:
Ghee - 1 tsp
Mustard seeds - 1 tsp
Asafoetida - a pinch
Curry leaves - a few
Spice paste:
Coriander seeds - 2 tsp
Chana dhal - 1 tsp
Dry red chillies - 3
Asafoetida - 1/2 tsp
Pepper corns - 1/2 tsp
Fresh Grated coconut - 2 tsp
Method:
Soak tamarind in warm water and extract juice to make about 2 cups. Wash and soak the dhal for 15 minutes. Pressure cook the dhal with turmeric powder, a pinch of salt and 2 cups of water until done. Drain the water from dhal and reserve. Mash the dhal well. You could use an immersion blender like I did. In a large stockpot/kadai add the tamarind juice, dhal water and chopped tomato. Boil until the tomato is cooked. Add the ground paste and more water as needed to make a thin rasam. Allow it to boil once. Add the mashed dhal and salt (if needed) and bring it to a boil. Remove from heat. In a small pan, heat ghee and add the items for tempering. Pour over the rasam with chopped coriander leaves. Serve hot with rice.

Thursday, June 5, 2014

Brown Rice Idli | Idli Dosa Recipes

I love experimenting when it comes to food. OK, making brown rice idli is not much of an experiment is it? Simply substitute idli rice with brown rice and make idlis. Boy, was I wrong. Yes, the idlis came out good and soft but bit too dry. Being a South-Indian, Idlis are a comfort food to me. And when it comes to experiment on what we love and too comfortable with is quite like tight-rope walking. I tried making some proportion changes and came up with this recipe. Brown rice idli, better that the regular idli health-wise without sacrificing on the soft and spongy nature. Served with Mint Chutney, the best breakfast ever.
Ingredients:
Soaking time - 5 hours; Grinding time - 1 hr; Fermentation time - 8-12 hrs; Cooking time - 12 mins
Brown rice - 1 cup (I used Brown Basmati)
Idli rice - 1 cup
Urad Gota - 1/2 cup
Fenugreek seeds - 1/2 tsp
Salt - 1 tsp or to taste
Method:
Wash the brown rice and idli rice with 4-5 exchanges of water. Add the urad dhal and fenugreek and wash for another 4 times. Fill with lots of water and let it soak for about 5-6 hours. Grind in a wet grinder sprinkling water little by little as needed. After about 45-50 minutes, when the batter is smooth and fluffy, add salt and mix. Transfer to a container (steel or glass but not plastic) and place in the warmest place in your kitchen for 8 hours or overnight to ferment.
When fermented the batter would have risen a little and fluffy when mixed. 
Heat water in a idli pot and grease the idli plates. Fill the idli moulds with batter and place in the idli pot. Cover and steam for 10-12 minutes. When done, remove the plates and allow to cool a little. Use a spoon to loosen up and edges and serve hot. Any chutney or sambar would be a great combo. I served with Pudhina Chutney.
Blender/Mixie Method:
The batter can be made in mixie also, just grind the soaked rice-dhal mixture one cup at a time to avoid over heating. Mix everything together at the end with salt and allow to ferment.

Linking these upto Vegan Thursdays.
Also linking this up to Healthy Diets: Healthy Breakfasts event of Priya hosted by Nandoos Kitchen and to Srivalli's Come Join Us for Breakfast.


Monday, June 2, 2014

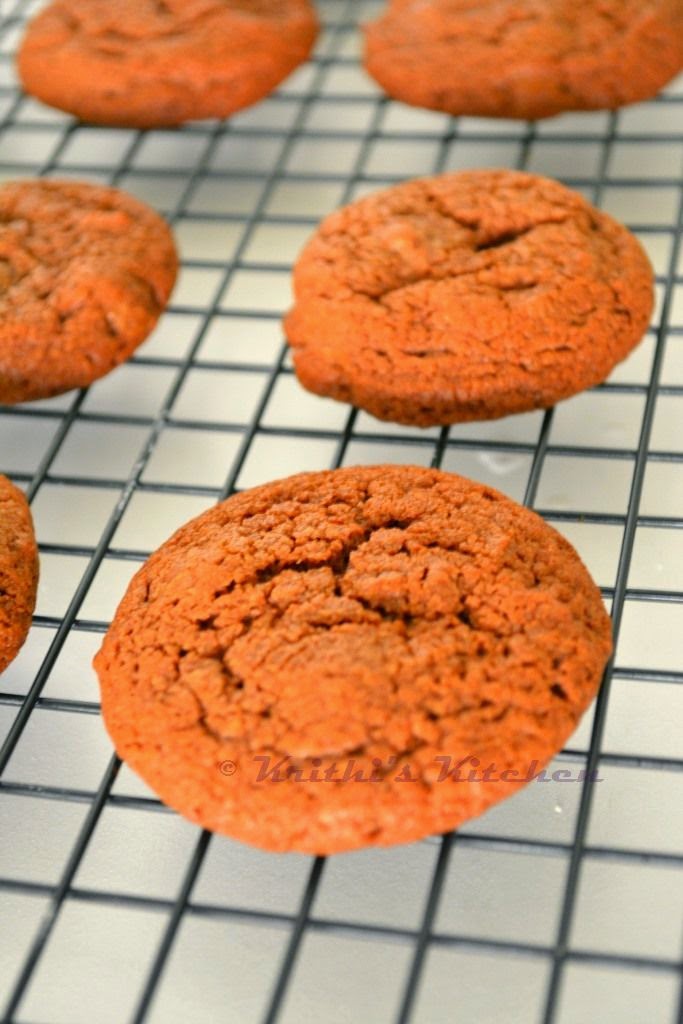
Nutella Double Chocolate Cookies | Cookie Recipes

It has been ages since I have shared a cookie recipe in this space. It is because I had not been making cookies that often. I bought a set of cookie cutters in the start of this year hoping to make cut out cookies on some occasion. I also bought a cookie scoop last week as an impulse buy. Luckily I got a reason to make these delicious beauties. Our friends were visiting us and what better reason would be there to make them.
Ingredients:
Makes 3 dozen cookies
Maida/All purpose flour - 1 cup + 1 tbsp
Cocoa powder - 2 tbsp
Salt - 1/4 tsp
Baking soda - 1/4 tsp
Butter - 6 tbsp
Brown sugar - 1/2 cup
Sugar - 1/4 cup (see notes below)
Nutella (Chocolate Hazelnut Spread) - 1/2 cup
Egg - 1
Vanilla extract - 1/2 tsp
Chocolate chips - 1/2 cup
Method:
Whisk the flour, cocoa, baking soda, salt together in a bowl. Beat the butter with a hand mixer until smooth. Add the sugar and beat until creamy. Add the Nutella and continue to beat until smooth. Add the egg and beat for half a minute and mix the vanilla. Now add the flour mixture in 3 additions beating well until no traces of flour remain. Fold in the chocolate chips. Cover the dough with a cling wrap and refrigerate for 10 minutes.
Preheat the oven to 350 F. Line a baking sheet with parchment paper. Using a cookie scoop or with a help of two spoons, scoop the dough and place the dough in the sheet with 2 inch spacing, 12 cookies per sheet. Bake in the preheated oven for 10-12 minutes. When done allow to cool in the sheet for 5 minutes and then transfer to the wire rack to cool completely. These cookies are super addictive, so share with your friends.
Notes: These cookies were bit too sweet for me. Next time I would reduce about 2 tbsp of sugar in the recipe.
Disclaimer: I am not the creator of this recipe. I scribbled this recipe from a website but forgot to bookmark it. Will link up the source as soon as I find it.

Linking this up to Vardhini's DIO - Kids friendly dishes.