Showing posts with label Guilty Pleasures. Show all posts

Thursday, February 26, 2015

Lilva Kachori / Broad Beans Kachuri | Indian Snack Recipes

I saw these Kachoris my friend Praks had posted in her FB page. Being a foodie, I did not wait long to ask her for the recipe. She was more than happy to share the recipe and added proudly that this is her family recipe. She is from Gujarat and the shape of the kachoris they make are like modaks and is different from the flattened kachoris from the other parts of India. I tried making them in both ways just for fun. Did I say that these were the fastest disappearing snack I made. My little one loved it to the core and asked if there was any leftover "Cat-turi" the next day.


Ingredients:
Makes 12 kachoris
For the filling:
Tuvar - 1 cup (fresh/frozen)
Green chilli - 1
Ginger - 1" piecec
Garlic cloves - 3
Cumin powder - 1/2 tsp
Sugar - 1/2 tsp
Coriander leaves - a fistful
Grated coconut - 1 tbsp
Lemon juice - 2 tsp
Oil - 1 tsp + more for deep frying

For the outer covering:
Wheat (atta) flour - 1 cup
Maida / All purpose flour - 1 cup
Salt - 1/4 tsp
Oil - 2 tbsp
Water - 2/3 cup (more or less)


Method:
Thaw the beans if using frozen. Pulse the green chilli, ginger and garlic in the small jar of the mixie once. Add the beans and pulse until coarse. Heat oil in a pan and add the ground beans mixture and cumin powder. Cook in medium heat sprinkling little water. When the mixture is almost cooked (shouldn't be mashed) add sugar, coriander leaves and salt. Remove from heat and add coconut and lemon juice. Mix well and allow to cool completely. I made the filling earlier in the day and refrigerated until evening.
Mix the flours, salt and oil. Add water little by little and make smooth, stiff dough. Make 12 equal sized balls of the dough. Also divide the filling into 12 portions. 
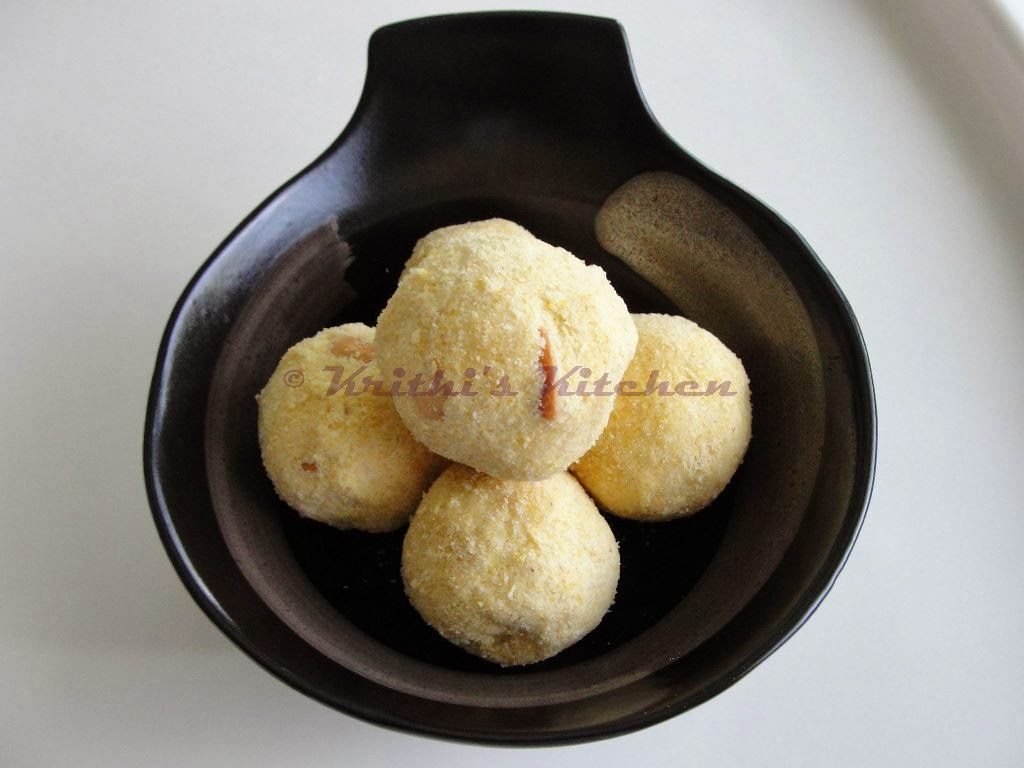
When ready to fry the kachoris, heat oil for deep frying. Roll one dough ball into a 3 inch disc. Place one ball of the filling and bring the corners of the flattened disc together and pinch to make a covered ball. You could pinch of excess dough if desired. This is how the kachoris are made in gujarat. If you want the flattened kachoris after covering the filling roll it ever so slightly to form a thick disc. Do not apply too much pressure while rolling out which may cause the outer covering to tear and expose the filling.
When the oil is hot, reduce the heat to medium and gently slide the kachoris to the oil. Cook in medium heat, flipping over once or twice until the kachoris are golden brown. Serve hot with ketchup or mint/tamarind chutney.
Notes:
It is important to make the dough stiff but pliable. Loose dough will absorb more oil which is not desirable. 
Fry the kachoris in medium heat slowly until the kachoris turn light brown. The oil should not be in high heat because it will cause the outer covering to brown faster and the insides will be under-cooked. 

Wednesday, November 26, 2014

Persimmon Pecan Crumble (Gluten-free) | Dessert Recipes

Here is a simple yet decadent recipe for your Thanksgiving Day desserts. What is more seasonal than a delicious fruit crumble with a fall fruit in it. Persimmons, the orange-y fruit is something I came to know about just an year ago. There are two varieties of it, the fuyu with the flat bottom with somewhat crispy flesh and the hachiya variety with a pointed bottom and a pulpy flesh. I have used the fuyu variety here. You can use either, although if using hachiya variety use the ripe ones.

Ingredients:
For the Persimmon filling:
Persimmons - 3 
Maple syrup - 2 tbsp (see notes)
Salt - a dash
Lemon juice - 1 tsp

For the Crumble Topping:
Oats - 1 cup (see notes)
Pecans, coarsely ground OR use Pecan meal - 1/2 cup (see notes)
Brown sugar - 1/4 cup (see notes)
Cinnamon powder - 1/2 tsp
Ginger powder - 1/4 tsp
Salt - a pinch
Butter, cold - 4 tbsp, cut into cubes

Method:
Preheat the oven to 350 F/ 180 C. Grease a 8" round/square baking pan with butter. Mix the oats, ground pecans, brown sugar, cinnamon, ginger and salt. Incorporate the cold butter in the oats mixture with your fingers. Cover and refrigerate. Chop up the persimmons and mix with the remaining ingredients for the filling. Place in the buttered pan. Pull out the oats mixture from the refrigerator and sprinkle over the fruits. Bake in the preheated oven for 40-45 minutes. Serve warm, preferably with a scoop of vanilla ice cream.
Notes:
Use brown sugar instead of maple syrup for the sweetness in the fruit filling if preferred.
To make pecan meal, roast the pecans in medium heat, allow to cool completely and pulse in the blender until it is coarse. If you don't bother gluten, use 1/2 cup of all-purpose flour instead of the pecan meal.
The 1/4 cup of brown sugar used in the crumble topping is not too too sweet, so add 2 tbsps more of sugar if you love a sweeter topping.

Monday, September 22, 2014

Pumpkin Spice Snickerdoodles / Pumpkin Cinnamon Sugar Cookies | Cookie Recipes

If you love cookies and sugar cookies especially, I am sure you will love this Pumpkin Cinnamon Sugar cookies aka Snickerdoodles. The reason and the meaning for the name Snickerdoodles is unknown but that doesn't stop us from indulging in these crinkly top beauties, does it? 
I love the Fall season. Apples and Pumpkins and the color orange, orange everywhere. Today being the first day of the Fall/Autumn season, what better way than to make the pumpkin version of these cookies. These are crispy on the outside but will be super soft on the inside, like biting into a cloud. Incidentally this is my 400th post and I wanted to post something sweet to celebrate that.
Ingredients:
Recipe from Sweet Pea's Kitchen
Makes 4 dozen cookies
All purpose flour / Maida - 2-3/4 cups
Cream of tartar - 2 tsp
Baking soda - 1 tsp
Salt - 1/2 tsp
Pumpkin spice - 2 - 3 tsp (based on how much you like pumpkin spice)
Sugar - 1-1/2 cup
Butter - 1 cup
Egg, slightly beaten - 1
Canned Pumpkin puree - 3/4 cup
For rolling:
Sugar - 1/4 cup
Cinnamon - 4 tsp
Pumpkin spice - 2 tsp (Pumpkin Spice Recipe follows)
Method:
Place the butter in room temperature for about 10 minutes. Mix/sieve the flour, salt, cream of tartar, baking soda and pumpkin spice together. Cream the butter and sugar together until fluffy with a hand mixer. Add the beaten egg and whisk until incorporated, about half a minute. Add the pumpkin puree and whisk another half a minute. Add the flour mixture and whisk until just mixed, scraping the sides of the bowl once. At this stage the cookie dough may be in a roll-able consistency. If it is not, pop it in the fridge for 30 minutes. Preheat the oven to 400 F/200 C. Line a baking sheet with parchment sheet. Mix the sugar, cinnamon and pumpkin spice for rolling the cookie-dough in a shallow bowl. Scoop about 1 tbsp of the cookie dough and drop in the sugar spice. Roll it around and place in the lined baking sheet, about a dozen in one batch. Bake for 10-12 minutes until the tops are puffed up and slightly crinkled. Remove from the oven and let the cookies in the baking sheet for a couple of minutes. Transfer the cookies to a cooling rack. These cookies taste great warm or room temperature and a perfect pair for a hot cup of chai. They keep good for a couple of days in room temperature.
Notes: I halved the above recipe and made 2 dozen cookies. That is a perfect amount for making some for ourselves and share the remaining with a friend.
Play around with the spices, use a combination of your favorite spices, chai spice would a be a great addition I think.

Make your own Pumpkin Spice
Mix the below spices and use as needed.

Ground Cinnamon - 2 tsp
Ground Ginger - 1 tsp
Ground cloves - 1/2 tsp
Nutmeg - 1/4 tsp (heaped)

Monday, June 2, 2014

Nutella Double Chocolate Cookies | Cookie Recipes

It has been ages since I have shared a cookie recipe in this space. It is because I had not been making cookies that often. I bought a set of cookie cutters in the start of this year hoping to make cut out cookies on some occasion. I also bought a cookie scoop last week as an impulse buy. Luckily I got a reason to make these delicious beauties. Our friends were visiting us and what better reason would be there to make them.
Ingredients:
Makes 3 dozen cookies
Maida/All purpose flour - 1 cup + 1 tbsp
Cocoa powder - 2 tbsp
Salt - 1/4 tsp
Baking soda - 1/4 tsp
Butter - 6 tbsp
Brown sugar - 1/2 cup
Sugar - 1/4 cup (see notes below)
Nutella (Chocolate Hazelnut Spread) - 1/2 cup
Egg - 1
Vanilla extract - 1/2 tsp
Chocolate chips - 1/2 cup
Method:
Whisk the flour, cocoa, baking soda, salt together in a bowl. Beat the butter with a hand mixer until smooth. Add the sugar and beat until creamy. Add the Nutella and continue to beat until smooth. Add the egg and beat for half a minute and mix the vanilla. Now add the flour mixture in 3 additions beating well until no traces of flour remain. Fold in the chocolate chips. Cover the dough with a cling wrap and refrigerate for 10 minutes.
Preheat the oven to 350 F. Line a baking sheet with parchment paper. Using a cookie scoop or with a help of two spoons, scoop the dough and place the dough in the sheet with 2 inch spacing, 12 cookies per sheet. Bake in the preheated oven for 10-12 minutes. When done allow to cool in the sheet for 5 minutes and then transfer to the wire rack to cool completely. These cookies are super addictive, so share with your friends.
Notes: These cookies were bit too sweet for me. Next time I would reduce about 2 tbsp of sugar in the recipe.
Disclaimer: I am not the creator of this recipe. I scribbled this recipe from a website but forgot to bookmark it. Will link up the source as soon as I find it.

Linking this up to Vardhini's DIO - Kids friendly dishes.

Thursday, May 29, 2014

Masal Vada / Cabbage Dhal Vada | Snacks Recipes

When it comes to deep-fried snacks, LO is just like his Dad.. Loves 'em. I made this crunchy crispy vadas for lunch the other day. It was a great combo for the Mysore Rasam (recipe coming soon) I made. I used a combination of chana dhal and split moong dhal and added cabbage in the place of regular onions. 
Ingredients:
Inspired from here
Dhal measurements in 160 ml cup; Makes 12 vadas
Chana dhal - 1/2 cup
Moong dhal - 1/2 cup
Dry Red chillies - 2
Fennel seeds - 1 tsp
Asafoetida - 1/2 tsp
Cabbage, chopped fine - 1-1/2 cups (can substitute onions)
Green onions, chopped - a handful (optional)
Coriander leaves, chopped - a handful
Salt - to taste (see notes below)
Oil - for frying

Method:
Wash and soak the dhals together for 45 mins to an hour. Drain completely and grind coarsely with red chilli, fennel seeds and asafoetida. Mix with salt, chopped cabbage (or onions), green onions and coriander leaves. Heat oil for deep frying. Make small patties and deep fry until golden brown on the outside and cooked through in the inside.
Notes:
Add salt just before frying. If not frying immediately after grinding, cover and refrigerate until use.
Linking this up to Vegan Thursdays.

Friday, April 25, 2014

Vegetable Cutlets / Potato Spaghetti Squash Cutlets | Snacks Recipes

It was one fine weekday evening and I wanted to munch on something crispy. I was in the mood for the vegetable cutlets we get in the bakeries in India, to be exact. Unlike India, in US it is not easy to walk down the road and buy those cutlets in the corner bakery the moment you think if it. But luckily I had all the vegetables and set out to make the cutlets in the late afternoon by myself.
Psst! I sneaked in half of the spaghetti squash I baked the previous day to the potato mixture. I had made spaghetti squash (semiya) upma with the other half. 
Ingredients:
Potato - 2
Spaghetti squash - 1/2 (see notes below)
Carrot - 1 
Coriander leaves / Cilantro - a handful
Dry mango powder - 1/2 tsp
Chilli powder - a big pinch
Salt - to taste
Maida/all purpose flour - 3 tbsp
Breadcrumbs (fine) - 1/2 cup
Oil - for deep frying

Method:
Boil the potatoes with skin on and allow it to cool. Peel and mash well. Chop the carrots finely and boil/microwave them. Scoop the flesh of roasted spaghetti squash. Mix the vegetables with the spice powders, coriander leaves and salt. Cover and refrigerate for a couple of hours. Heat oil for deep frying. Mix the flour with water to make a runny batter. In another plate set the breadcrumbs ready. Take lime sized potato mixture and press in your palm gently to make patties. When the oil is hot, dip the patty in the maida batter, shake the excess. And roll in the breadcrumbs mixture on all sides and drop in the oil for deep frying. Turn over once and fry until golden brown. Remove with a slotted spoon and drain in a paper towel lined plate. Serve hot with ketchup.
Notes: 
If not using spaghetti squash, substitute with another potato and a handful of peas. 
To prepare spaghetti squash, cut it lengthwise and season with salt, pepper and olive oil. Roast in a 375F oven for 45 minutes. Allow to cool and shred out the flesh with a fork. Spaghetti squash is a great low-carb substitute for pasta or vermicelli.

Wednesday, November 13, 2013

Easy Instant Unniyappam / Banana Kuzhi Paniyaram / Rice Flour Sweet Appam

All fond memories are made through food. Or at least the food enthusiast in me try to connect memories with food. There is a memory associated with these unniyappams. I first tasted unniyappam in one of dad's friends' home when I was around 10. They are a sweet family from Kerala and Aunty would make this every single time when we visited. I still remember how fondly she used to prepare these appams for us kids. Then they moved back to Kerala after Uncle retired and we all moved to different cities for work. But then the world has shrunk these days due to the advent of social media and we have got a chance to reconnect with our old friends. It is through Facebook that we reconnected with their family. I chanced upon to see her daughter, wishing her mother on her birthday. I too conveyed my wishes to Aunty and the foodie in me made a mental note that I have to make her unniyappams one day.
Ingredients:
Serves - 4 for snack
Rice flour - 2 cups
Jaggery - 1/2 cup (tightly packed) - see notes below
Banana - 3 small or 2 big ones - mashed
Salt - a pinch
Cardamom powder - 1/4 tsp
Baking soda - a big pinch
Water - 1/4 cup + more to make the batter
Oil - for frying in the pan

Method:
Mix jaggery in 1/4 cup of water and heat until it is melted. Filter with a fine mesh strainer. Mix the jaggery syrup with rice flour, mashed bananas and water to make a batter of pouring consistency but slightly thicker than dosa batter. Stir in salt, cardamom powder and baking soda. Heat the paniyaram pan / abelskiever pan in medium-high flame. Pour about 1/4 tsp of oil in each kuzhi (indentation). Pour enough batter into each kuzhi to fill. When little bubbles start to appear on the top, flip using a toothpick or chopstick to about halfway. After about another minute, flip again completely. At this stage all the sides of the appam should be golden and well-formed to a round shape. Reduce the heat to medium and continue to cook until the insides are cooked through. Repeat for the rest of the batter.
Notes:
1. The amount of jaggery used here yields a mildly sweetened unniyappam. For sweeter ones use 3/4 to 1 cup of jaggery. The water for making syrup should be 1:2 with jaggery.
2. Traditionally the unniyappam is made by soaking rice and grinding to form a batter with jaggery and banana. Another point to make it traditional is to add small pieces of fresh coconut fried in ghee and black sesame seeds to the batter.

Saturday, November 2, 2013

Pasiparuppu Urundai / Moong Dhal Ladoo - Wish you a Happy Diwali | Diwali Sweets Recipes

Wish you all a very Happy Diwali! Hope you are having lots of fun celebrating the festival with friends and family. Last year during Diwali we were relocating cross country, so I coould not make any sweets. This time I made Murukku, Ribbon Murukku, Jangiri and this Pasiparuppu urundai. If you are someone who are pressed for time then you should definitely make this one. With just 6 ingredients, it gets ready in 30 minutes and tastes like you have put a lot of effort into making them.
Ingredients:
Measurements in standard cup/spoon measurements; Makes about 16-18 lime sized ladoos
Yellow Moong dhal / Pasi paruppu - 1 cup
Raw Rice - 1 tbsp
Sugar - 1 cup
Ghee - 1/4 - 1/3 cup (as needed)
Cardamom - a pinch
Cashews - 10 - broken into little pieces

Method:
Dry roast the moong dhal and rice in medium heat until light brown. Transfer to a plate and allow to cool completely. Meanwhile powder the sugar and fry the broken cashews in a teaspoon of ghee. Process the moong dhal-rice to a fine powder. In a mixing bowl, add the moong dhal-rice powder, powdered sugar, cardamom and fried cashews. Mix well with a wooden spoon. Warm ghee in the same kadai which was used to fry cashews. When fully melted (should not boil, just warm), turn the heat off. Take about one-fourth of the dhal mixture and add 1-2 tsp of ghee or as required. Mix well with your fingers and try to make little lime sized balls, pressing tightly in your palm and fingers. If the mixture crumbles, add little more ghee and make ladoos. Super tasty moong dhal ladoos are done!
Linking this up to Spotlight - Festive Treats; Vardhini's Diwali Bash; Only - Diwali Treats by Pari.
Only Diwali treats

Thursday, October 31, 2013

Jangiri / Jhangri | Indian Festival Recipes

Jangiri is DH's favorite sweet. It is true that he is not a great fan of sweets, but turns out he just loves this one. So I set out to make this one at home for Diwali. Honestly, I wasn't comfortable making jangiri at home. Ok, I know that is not a good line for any self-respecting food blogger to say. But hey, I am a regular home-cook first and then comes food blogging. But being a food blogger has its own perks. I dare to try new recipes with loads of inspiration from my fellow bloggers and I am happy I tried this one. At the end of the day, the thing that made me happy was a thumbs-up from my DH.
Also I have compiled a list of FAQs at the end, for newbies at Jangiri-making like me.
Ingredients:
Recipe Source - Grandma;
Makes - about 40 medium sized jangiris; Measurements in standard (240 ml) cups
Whole Urad Dhal (Gota) - 1 cup
Raw rice - 1 tsp
Sugar - 1 cup
Water - 3/4 cup
Lemon juice - a few drops
Orange food color - a pinch 
Oil - for deep frying

Method:
The batter:
Wash and soak urad dhal and rice in water for 2 hours. Drain and reserve about 1 cup of water. Use a wet grinder and grind the drained urad dhal to a smooth paste, sprinkling about few tbsps of the reserved water for about 3-4 times. The whole batter should be ready in about 30-40 minutes. The batter would be fluffy and should float to top when dropped in a bowl of water.
The sugar syrup:
Melt the sugar and water over medium heat in a wide bowl. When the sugar dissolves completely and starts to bubble up, remove from heat and add a few drops of lemon juice and orange food color. Mix and set aside.
The piping:
Line a plate with parchment paper. Fill a plastic bag (ziptop) with the batter and make a small slit in one of the corners for piping.
Remove the batter from the grinder to a bowl and mix the orange food color. Take a plate and try piping jangiri patterns on it for practice. Unlike murukku you would have to pipe jangiris directly into the oil. Do not worry if you do not get the patterns right, just go for a mini jangiri version which is just a free form pattern.
The frying:
Heat oil in a wide shallow fry pan for deep frying. The oil should only be an inch in depth in the pan. When the oil starts to emit small bubbles, pipe the jangiris into the oil. Always have the oil in medium heat. Flip and continue to fry until the bubbles around the jangiris are almost gone.
The Sweetening:
When the jangiris are fried and crispy, drain completely with a slotted spoon and transfer to the sugar syrup. Use a wooden spoon and press them slightly for about a few seconds, then flip over. Remove after 2 minutes and plate in the parchment lined plate. Allow a standing time of 1 hour for best taste.
FAQs on Jangiri:
Why is rice added when making jangiri?
Rice is added to give body and a slight crispness to the jangiri.
Why is lemon juice added to the sugar syrup?
Lemon juice is added to prevent the sugar from crystallising.
What is the best way to pipe a jangiri?
Traditionally a thick cloth is used with a hole in the center. This hole is generally secured with an overlock stitch to prevent further tearing. For one time use you could use a ziploc bag with a corner cut, like mehndi cone or a ketchup bottle. Personally the ketchup bottle squeezing did not work for me since the air filled in the ketchup bottle while squeezing does not have a means to escape.
Why is my jangiri light in color?
Not enough food color or not properly fried.
Why is my jangiri soggy/floppy?
Not properly fried. Though the frying temperature of the oil should be low it should not be too low. Like any other fried food, low temperature of the oil makes the food absorb more oil and become soggy.
Another reason the jangri turns out soggy is because the dough is watery. Add couple of teaspoons of rice flour and try again.
Why is my jangiri too crispy?
There could be two possible reasons. One, the jangiri is too thin, meaning the pipe thickness is too thin. Or, It hasn't soaked enough time in the syrup to become soft.

Linking this up to Vegan Thursdays.

Saturday, October 12, 2013

Mirapakaya Bajji / Stuffed Milaga Bajji

Do you remember the friends we visited for dinner in my German Chocolate Cake post. They are a sweet couple and the dinner was super awesome. Now, DH and spicy foods are two entities who cannot be separate. And needless to say when they made Andhra-style Mirapakaya bajji for appetizers, he was in cloud nine. Seeing how much he loved the bajji, I duly asked for the recipe and they were happy to share.
Ingredients:
Serves - 5
Serrano Peppers / Bajji Milagai - 10 (Choose the light colored ones and definitely stay away from the dark ones)
Besan / Chickpea flour - 2 cups
Rice flour - 1/3 cup
Ginger garlic paste - 1 tsp
Chilli powder - 1 tsp or to taste
Salt - to taste
Baking soda - a big pinch
Asafoetida - a pinch
Water - as needed
Oil - for deep frying
For the Stuffing:
Tamarind paste - 2 tbsp
Coriander powder - 1 tsp
Ginger garlic paste - 1 tsp
Salt - to taste

Method:
Using a small paring knife, carefully slit the peppers on one side with the stem intact. Use the knife or a sharp spoon to scrape out all the seeds. Set the peppers aside and wash your hands with soap and water. Mix the ingredients for stuffing and place about 1/2 tsp of of it in each pepper. Heat the oil for deep-frying. Meanwhile, mix the batter for bajji without any lumps. The batter should be of dripping consistency. Take the peppers by the stem and dip in the batter to coat all sides. Gently drop in the oil and cook in medium-high heat until golden brown. Remove from heat and serve with chopped onions and coconut chutney.
Linking this up to Nupur's What's with my Cuppa?; Birthday Party.

Sunday, September 29, 2013

Methi Matar Malai / Fenugreek leaves and Peas Creamy Curry | Indian Curry Recipes

Green leaves are the nature's bounty in its healthiest form. When I was little, I used to hate them as most other kids would do. Now I love to cook them and eat them more. I do not fail to pick up a bunch of these beautiful Methi leaves whenever I see them. I made this Methi Matar Malai for dinner to go with our chapathi the other day.

Ingredients:
Serves - 3-4; Preparation time - 50 mins
Fenugreek leaves - 1 bunch (can substitute 3 cubes of frozen methi leaves)
Frozen Peas - 1 cup
Oil - 1 tbsp
Cumin seeds - 1 tsp
Onion - thinly sliced - 1 cup
Ginger garlic paste - 1 tsp
Tomato - 2 - blanched, skin and seeds removed - pureed (I used 1/2 cup of canned crushed tomatoes)
Turmeric powder - a pinch
Kashmiri Chilli powder - 1-1/2 tsp
Garam masala powder - 3/4 tsp (use 1 tsp if the garam masala powder you use is less spicy)
Coriander powder - 1 tsp
Kasuri methi / Dried Fenugreek leaves - 1 tsp - crushed
Fresh cream / half & half - 1/2 cup
Group 1:
Milk - 1/2 cup
Cashew nuts - 10
Poppy seeds /khus khus - 1 tsp
Method:
Preparation:
Warm the milk and soak the cashew nuts and poppy seeds for 15 minutes. Make a fine paste and set aside.
Pick the leaves and place in a bowl and fill it with water. After a couple of minutes, gently scoop the leaves and discard the water. Repeat this process for a 2-3 times until all the dirt has been drained. If using frozen methi leaves, thaw (or defrost). Place in a clean kitchen towel and squeeze until all the water is out.
For fresh peas, pressure cook with water and salt for 2 whistles. Drain and set aside. If using frozen peas, wash, drain and MW for 2-3 minutes.
Making the Curry:
Heat oil in a kadai and splutter the cumin seeds. Add the sliced onions and cook until it turns soft and translucent. Add the ginger-garlic paste and cook for 3 minutes. Add the tomato puree and cook for another 2 minutes. Add the spice powders and continue to cook in medium heat until the mixture becomes shiny and gives out oil. Add the peas and methi leaves. Mix and saute for a while and add the ground cashew paste with 2 cups (or less) of water and salt. Allow to boil in medium heat for about 15-20 minutes. Sprinkle the kasuri methi and add the fresh cream. Allow to boil for about 3-5 minutes and remove from heat. Serve hot with roti / pulao / jeera rice.
Linking this up to Srivalli's Side Dish Mela; MLLA by Susan & Lisa; Kid's delight - Potluck Party.

Sunday, September 8, 2013

Mini Medhu Vada / Ulundhu Vada | Indian Festival Recipes

Vadas are the deep fried delicacies which are capable of making a regular day to a festive one. These little beauties are good for entertaining or perfect for offering to god as prasadam. It is not difficult to make crispy-on-the-outside-fluffy-on-the-inside vadas. Just a few key points to follow and you will have super tasty vadas. 
Ingredients:
Makes 10-12 mini vadas; Serves - 2
Whole Urad dhal - 1/2 cup
Peppercorns - 1/4 tsp - crushed
Salt - 1/4 tsp or to taste
Oil - for deep frying
Method:
Rinse the whole urad dhal 3 times and soak in water for 2 hours. Drain well. Use the small jar of the mixie/blender and grind into a smooth paste. Mostly it wouldn't need water, but if it doesn't budge, 2 to 3 tbsps of water can be added to grind. The batter would be fairly thick, more like cookie dough consistency. That is fine and it is what we are looking for. When ready to make vadas, transfer to a wide bowl with crushed peppercorns. Beat with a spoon for about 5 minutes. This step is to make the batter soft and fluffy. Add salt just before frying. Heat oil for deep frying. Line a plate with paper towels. Have a bowl of water by the side of the batter bowl. Dip your hands in the water and take lemon sized batter and toss gently as you would with a ball. Dip your thumb again in water and make a hole in the center of the ball. Gently slide into the hot oil. Fry for about 1-2 minutes and flip over with a slotted spoon. Continue to cook and remove from the oil and place on the paper lined plate. Do not put more than 3-4 vadas in a batch. Remove the vadas when it turns golden brown. Serve hot with Coconut Chutney.
Notes:
1. This ground batter mixture can be refrigerated if needed for about a day. If using refrigerated batter let it sit in room temperature before whipping. Add salt only just before frying. 
2. Curry leaves, chopped onions, coriander leaves, chopped green chillies can also be added as desired. I had decided to keep it simple for neivedyam.
Linking up to the following events - Kid's Delight - After school bites; Whats with my Cuppa by Nupur; Spotlight - Raksha Bandhan;

Wednesday, May 1, 2013

Pasi Paruppu Payasam / Moong Dhal Kheer | Indian Festival Recipes

DH is not a sweet lover but still he can't say no to few of them. Gulab jamun, Carrot Halwa and this Pasiparuppu payasam are the very few sweets which he likes. I made this Pasi paruppu payasam for Tamil New Year this year. I wanted to reserve it to celebrate my 250th post. I didn't think I could make it this far but I am happy and thankful to my lovely readers. And of course my family and friends for the continued support and encouragement. This paruppu payasam has no milk or coconut milk and keeps good for a couple of days in the fridge. 
Ingredients:
Serves - 2 to 3
Split Yellow Moong dhal / Pasi Paruppu / Hesaru Bele - 1 cup
Grated Jaggery - tightly packed - 1/2 cup
Water - 3 cups + 1.5 cups (see notes below)
Cardamom powder - a pinch
Ghee / Oil - 1 tsp
Cashew nuts - 5 - broken into little pieces
Grated Coconut - 1 tbsp
Method:
Dry roast the moong dhal in medium heat until it turns light brown in color. Pressure cook with 3 cups of water for 2 whistles (see notes below for stovetop method). Meanwhile dissolve the jaggery in the remaining water and filter. Heat with cardamom powder in a saucepan. When the dhal is done, mash slightly with the back of a spoon and mix with the heated jaggery water. Cook this dhal-jaggery mixture in medium heat. When the mixture comes to a boil remove from heat. Heat ghee in a pan and roast the cashew nuts. Remove and set aside. In the same pan roast the grated coconut in low heat until light brown. Add the roasted cashews and coconut to the dhal and serve hot. This kheer can also be served chilled.
Notes:
1. If serving chill, allow the payasam to come to room temperature and then pop in the refridgerator. Chill for a minimum of 2 hours and serve.
2. The 3 cups of water I used for cooking the dhal got absorbed fully when I pressure cooked the dhal. So I had to use 1.5 cups of water to the jaggery to bring to the desired consistency. You may need more or less water.
3. The dhal can also be cooked without a pressure cooker. In a medium saucepan, boil 3 cups of water and add the roasted moong dhal. Cook in medium-high heat until the dhal is cooked through. The moong dhal tends to be frothy and boil over. So keep a close eye and stir often.The dhal should be mashable with the fingers but still hold the shape.
Check out what I made for other milestone celebrations.
100th day of blogging - Honey Brownies
100th post - Carrot Kheer
2nd blog anniversary - Paal Kozhukattai
5 lakh hits - Mocha Chocolate Ricotta Creme


Sending this to Srivalli’s Kid’s Delight event hosted by Pavani.

Thursday, April 11, 2013

Kayi Obbattu / Thengai Poli - Ugadi Wishes!

Happy Ugadi to everyone.. In our house Ugadhi is celebrated in a simple way with decorating the main entrance of the house with mango leaves, preparing ugadi pachadi, making this obbattu and like in all other Indian festivals, worshipping God for health and wellness. Being in US though I do not have access to mango leaves or neem flowers to make ugadi pachadi, I thought why not try the obbattu part.. This is a very simple recipe to make and takes much less time to make unlike most other Indian Sweets.


Ingredients:
Yields 12 pieces of 4" obbattus
Maida / All Purpose Flour - 1 cup
Oil - 1 tbsp + more for spreading out the obbattu
Grated Coconut (unsweetened) - 1 cup
Sugar - 1 cup (Jaggery can be substituted, but this is how it is made at my home)
Water - 1/3 cup + more for kneading dough
Cardamom powder - 1/4 tsp
Salt - a pinch
Method:
Mix the maida with salt and add water little by little to make a loose dough. Knead until the dough becomes non-sticky. Coat with 1 tbsp of oil, cover and set aside for a minimum of 30 minutes. Meanwhile prepare the coconut filling. In a non-stick kadai, heat water and sugar with cardamom powder until all of the sugar dissolves. Add the grated coconut and mix in medium heat until most of the water evaporates and the mixture becomes sticky. Remove from heat and allow it to cool. When it is cool enough to handle, make 12 lime-sized balls. Divide the dough also into 12 portions. In a flat surface, spread a plastic sheet (cling film works good here) and apply little oil. Place a dough ball and spread into a circle (trust me it would be irregular, but no worries) of 4" wide using fingers. Place the pooranam-coconut filling in the center and cover with the edges of the dough to close the filling completely. Press and spread again with fingers to make obbittus(poli). Heat a tawa and carefully place the spread out polis and allow to cook. Flip over and cook for another couple of minutes until done. 
Notes:
1. Kneading well and setting aside the dough for 30 minutes ensures formation of gluten which enables the elasticity of the dough for easy stretching while spreading.
2. The filling has to be moist, frying it too much would dry it out and result in hard filling. It is impossible to use it as a stuffing then.
3. Oil/Ghee can be used while cooking. I did not use any.
4. I halved the above recipe to make 6 pieces just right for the 2 of us for a couple of days.
5. This stays good in room temperature for upto 3 days.
Linking this up to Celebrating Ugadi event of Madhu.

Saturday, October 6, 2012

Badami Mushroom Matar Masala / Mushroom and Peas in Almond Curry | Indian Curry Recipes

I love mushroom. Mushroom is a low calorie herb which is very versatile. I have made and blogged about four different mushroom recipes viz. Bellpepper Mushroom Masala, Minty Mushroom Curry, Chettinad Mushroom Curry, Kadai Mushroom. I never get exhausted in trying mushrooms in different ways and always in the lookout for more. This time I tried Denny's Mushroom Badami curry and it was very delicious.


Ingredients:
Mushrooms - 1-8oz pk - cleaned and sliced thin
Frozen peas - a handful
Cinnamon stick - 1 inch
Coriander powder - 1/2 tbsp
Garam masala - 1/2 tsp
Curd/Greek Yogurt - 4 tbsp - whisked smooth with a little water
Coriander leaves - 1/4 cup
Salt - to taste
Oil - 2 tsp
Freshly ground black pepper - 1/2 tsp
Make a paste:
Onion - cubed - 1/2 of a big one
Green chilli - 2 or 3
Kasakasa / Poppy seeds - 1/2 tbsp
Ginger garlic paste - 1/2 tbsp
Almonds - 12-15
Method:
Grind the almonds until almost fine powder. To that add the remaining ingredients to make a smooth paste.
Heat oil in a kadai and add the cinnamon stick. Add the ground paste and fry for about 3-4 mins, until it changes little darker. Add the coriander powder, garam masala powder and salt. Reduce the heat to medium  and mix in the whisked yogurt while stirring continuously. This way the yogurt would not curdle in the heat of the spices. Now add the sliced mushrooms and one cup of water. Cover and cook for 5 minutes. Remove the cover and continue to cook for another 5 minutes. Add the green peas and coriander leaves and simmer for another 5 minutes. Sprinkle with fresh ground black pepper and serve with rotis or pulao.
Sending this creamy masala to Serve It - Boiled event happening here and at Denny's. Also sending to Sumee's Bon Vivant#9-Simply Sides and Radhika's Let's Cook-Protein rich food.

Saturday, April 21, 2012

Urad Sweet Bonda / Deep Fried Sweet Vadas with Urad Dhal / Indian Zeppoles

Do you have some family recipes which you have almost forgotten about. Well, I had forgotten about these beautiful Sweet Urad vadas until my sister reminded about them recently. She had made these for Pongal festival for offering to god. These sweet vadas (or vadeyvu/vadaevu as we call it in our home) is a must in our family for all festivals and marriages. They are similar to Medhu vadas, but slightly sweetened and have a mild spicy undertone due to the addition of pearl onions and cumin seeds.
Ingredients:
Makes about 20-25 small vadas
Whole Urad Dhal - 1 cup (I used a 120 ml cup)
Sugar - 1/2 cup
Shallots / Pearl onions / Sambar onions - 2 - peeled and halved
Cumin seeds / Jeera - 1/4 tsp
Curry leaves - a few (Optional - Gives a lovely aroma)
Salt - a pinch
Oil - To deep fry
Method:
Wash urad dhal about 5 times with exchanges of water. Soak with about 3-4 cups of water. After 1 hour store the soaking urad dhal in the refrigerator for another hour. After 2 hrs, drain the urad dhal reserving the soaked water. Place it in a blender and grind until smooth. A couple of teaspoons of water may be added while grinding. Make sure the batter is smooth but thick. Now add sugar and pulse once. Add the shallots, cumin seeds, salt and curry leaves and pulse a couple of times. Transfer the contents to a wide bowl and whisk for about 3-5 mins. This makes the thick batter fluffy to enable the vadas/bondas to be soft in the inside yet crispy on the outside.
Heat oil for deep frying in medium heat. Take a tablespoon-full of batter and drop into the hot oil and fry until golden brown. When done remove using a slotted spoon and drain excess oil in a tissue paper. Serve hot.
To serve: Break the vadas into two and sprinkle some sugar, drizzle little ghee over it. Enjoy!
Note: Make sure the batter is thick before adding sugar, because adding sugar loosens the batter.
Sending these beauties to Walk Through Memory Lane event hosted by Rasi for this month and also to Kitchen Chronicles - Heirloom Recipes event by Kalyani hosted by Saras.

Saturday, April 14, 2012

Oma podi - South-Indian Tea-time Snack - Guest post by Vardhini of Cooks Joy

This month's guest host is by my dear blogger friend Vardhini. I believe most of my blog friends would definitely know Vardhini of Cooks Joy (Previously Zesty Palette). She is an ingenuous food blogger giving the most tempting recipes. She is one person who presents each post with beautiful step-by-step pictures. Now how cool is that. It takes a lot of sincere effort to do that and I know it is pretty tough for me :). I especially like her Dish-It-Out event. If you are wondering what it is you should head over to her space and check it out.
She recently moved to her own domain - Cook's Joy and it is simply elegant. When I asked her to do a guest post, she happily agreed even on a very short notice. And she made this delicious snack - Oma Podi, just for me. Oma podi is a South-Indian deep-fried snack made with Besan and carom seeds (Bishop's weed). It is similar to murukku/chakali but has a thinner texture and literally melts in your mouth. Now I present Vardhini in her own words.


I probably have told this quite a few times already, but blogging has opened a whole new world for me and brought me a lot of friends. My first interaction with Krithi was roughly a year ago when she was hosting the pancake event. I was new to blogging and did not know how to link up to the event :). Thus, started my conversation with her on the same.
Over the past year we have interacted a lot of times and I was thrilled when she asked me to do the guest post and finally decided on this recipe. She has a warm and cozy blog and her pictures are adorable. She does a lot of fusion cooking and her recipes are mostly healthy.
Ever since I made Idiyappam, this has been on the list. A lot of recipes call to grind the ajwain(omam), but my mom suggested that I just extract the water so that I do not end up with tiny pieces of ajwain blocking the holes. Just the water had a lot of flavor and everyone loved it. As with most snacks this one also flew out in a very short amount of time.

Ingredients:
1 cup besan (kadala maavu)
1/4 cup rice flour
1 tsp ajwain (omam) soaked in 1/4 cup hot water
1 tsp ghee
Salt to taste
Pinch of turmeric
Asafoetida
Oil to deep fry
Method:
Soak ajwain in hot water for an hour.

We have to extract the water. For this mash the ajwain with a spoon to get the flavors.

Then strain using a tea strainer. Keep the strained water aside.


Take besan and rice flour in a bowl.


Add asafoetida and turmeric powder.


Add salt.


Add ghee.


Add the strained ajwain water little by little and form a stiff dough. (If more water is needed, use regular water.)


We need a murukku press for this and this is the disc we will be using.


Heat oil in a vessel and load the murukku maker with the dough. Directly press the murukku maker over the hot oil allowing the strands to fall into the oil. Keep moving the murukku press to form a circle.


When the hissing sound stops the oma podi is done. Remove from oil. It hardly takes time to cook because it is thin.


Stack of yummy oma podi ready to be eaten.


Enjoy!


For more recipes from Vardhini, do head over to Cook's Joy!